How to Make a Dipole Antenna [FREE DOWNLOAD – Printable Phonetic & Morse Code Cheat Sheet]
Amateur Radio, Emergency Communication
The easiest antenna to design, source, make, erect and use in the field is a dipole antenna. And knowing how to make a dipole is the key to success for any ham radio operator, particularly when operating in the field during a worst-case scenario. The antenna that you’ll learn to make here can be sourced in the field, constructed from scratch with nothing more than a pocket knife, and make contacts possible hundreds or even thousands of miles away. And the principles learned while building this antenna can be adapted and applied to a variety of antennas suited to just about any situation.
There’s a good reason why dipole antennas are introduced and highlighted in the FCC Technician Class ham radio license exam: a ham that knows how to make a dipole antenna understands the basic principles behind almost every other type of antenna. Just about every antenna is a dipole or requires “two sides” at some level. Vertical antennas work better with a radial system, long wires require a counterpoise of some form, even the “rubber ducky” on handheld radios use the operator’s body for the “other half” of the antenna system.
How to Make a Dipole Antenna
It happens, you’re in the field with your HF go-kit supporting emergency communications and all of a sudden, the signals go dead. You key the mic and make a few calls to see if anyone can hear you. Out of the corner of your eye you notice that the SWR meter is pegging the needle to infinite. When you walk outside to check the antenna system you’re met by a relief worker with a sheepish grin and holding a chainsaw in one hand and a tangled mess of wire in the other.
Or, you have had to bug-out because the stuff finally hit the fan. In a mad-dash you grab your well-equipped bug-out bag, your portable radio gear and head out. Hours later you find an ideal camp location. After setting up a shelter, processing wood and starting a fire, you decide to break out your QRP radio to gather some intel. Panic sets in as you realize that you took your 20-meter dipole out of your kit to fix a broken feed-point, but never put it back.
It doesn’t really matter how it happened, but what does matter is that you need an antenna to get you on the air to call for help. Whether you need to repair a damaged antenna or design, source, and build one from scratch, you’ll be glad that you know how to make a dipole antenna.
We’ll make this dipole for 14.270MHz. Why 14.270MHz?
First, all things being equal the 20-meter band is a stable high-frequency band for voice propagation. Frequencies higher than 20-meters (>14.350 MHz) also work well for long distance communication, but they tend to be unpredictable. The maximum usable frequency (MUF) is most often above 14.350 MHz, but still too low for 15-meters and higher. 17-meters is a possibility, but contacts are much less common on that band.
Second, 80, 60, and 40 meters tend to be stable, particularly after dark and are optimal for near-vertical incidence skywave (NVIS) which is often used for amateur emergency communication (EmComm), but an antenna for those wavelengths is at least twice as long, which makes sourcing materials twice as difficult.
30-meters is a good compromise for propagation, but transmissions on that band are restricted to CW (Morse code) and data modes. We’re aiming to have our voice heard because it’s the most intuitive mode of communication.
Third, our goal is to access frequencies monitored by the largest number of ham radio operators, thus giving us the greatest chance of being heard, even with a low power (QRP) radio and a sub-optimal antenna. In my post “Emergency Frequencies Every Prepared Family Knows” I mention 14.265MHz and 14.300MHz. SATERN (Salvation Army Team Emergency Network) meets on 14.265MHz every day, except Sunday, at 1600UTC and activates for most large-scale disasters. 14.300MHz is an “internationally recognized center of activity” meaning that someone is monitoring it 24 hours a day, 365 days a year. The Intercontinental Traffic Net, the Maritime Mobile Service Net, and the Pacific Seafarers Net all conduct communication on 14.300MHz and all of their control operators are trained in emergency communication. If you call “EMERGENCY, EMERGENCY, EMERGENCY” on 14.300MHz, someone will hear you.
Let’s assume that we don’t have any wire for either the antenna or feedline. A simple dipole antenna can be made with any wire. Sure enough, different materials will affect the effectiveness of the antenna in different ways, but in an emergency, bugout, or disaster situation a rule applies: the antenna you have is better than no antenna.
There are a multitude of sources for harvesting wire, but access to those sources may require compromises in quality and, maybe, ethics. Wire can be harvested from downed powerlines (for safety, only touch powerlines that are clearly disconnected at both ends), scrapped construction material, abandoned automobiles, discarded electronics, fences, landfills, etc. In a true dire, life and death situations wire can be harvested from homes, businesses, and other structures, but remember that exploiting some of these sources is crossing over into the realm of looting and theft. Resorting to criminal activity is a decision that we all hope we’ll never have to make.
It’s not unreasonable to come across a few dozen feet two-conductor speaker wire or lamp cord alongside the road or in a landfill or abandoned construction site, so we’ll use that. There are some advantages to using lamp or speaker cord. First, most lamp or speaker wire will be at or near 18 gauge and stranded. This makes it pliable and workable. Second, it’s construction of two parallel insulated will mimic twin-lead feedline. This means that we don’t need to source additional wire to connect the antenna to the radio.
It’s our lucky day (except for the whole zombie apocalypse thing going down). We’ve just found 50 feet of speaker wire in a landfill.
How to Make a Dipole Antenna – Design It

Four hundred sixty-eight. That number was drilled into your head while you studied for the ham radio exam. (Haven’t passed the ham radio exam, yet? Get started here at http://valiantoutfitters.com/how-to-study-for-the-ham-radio-test/.)
A simple dipole antenna radiator is roughly one-half wavelength long related to the intended frequency. It’s composed of two equal length wires each one-quarter wavelength long (two quarters equal a half). To calculate the total length of the radiator (in feet) we use 468 divided by the desired frequency in megahertz. To make our dipole antenna we’ll aim for 14.275 MHz which is in the 20-meter band. Let’s apply our calculation for the radiator.
468 ÷ 14.270 = 32.75 feet.
Each leg, created by separating the wires, will be half of that: 32.75 ÷ 2 = 16.4 feet.
Now, we need to add another half-wavelength (32.75’) for the feedline. But the electrical-magnetic properties of two wires in parallel (twin-lead) require a different calculation to determine a half-wavelength. In this case, the equation is 492 divided by frequency in megahertz then multiplied by the velocity factor, which for lamp cord approximately 70%.
(492 ÷ 14.270) X .7 = 24.1 feet
It’s easier to shorten wire than it is to add it, so let’s make the first cuts a little long. 17 feet for the legs and 25 feet for the feedline should be enough.
That brings our total length of two conductor wire needed to make a dipole antenna to 42 feet.
As luck would have it, we just found 50 feet of two-wire speaker cord in a landfill!
How to Make a Dipole Antenna – Construct It
The job of measuring the speaker wire is much easier if we have a tape measure handy, but like me a tape measure probably isn’t part of you bug-out bag or bushcraft gear. No worries, there are plenty of ways to both accurately or guestimate lengths using common items. And the good news is that measurements down to the fraction of an inch or even an inch aren’t necessarily deal breakers.
A multi-tool is an essential part of your bug-out bag. The ruler on the multi-tool can help. Maybe you have some specific lengths of cordage in you bug-out bag. Most hands measure 8-10 inches from thumb tip to pinky tip. A tire rim on a car can be used to measure, if you can read the rim diameter on the tire. U.S. dollar bills are just over 6” long.
For longer measurements, most of the following items are about 6’ long or tall: refrigerators, twin or full-size mattresses, a-frame ladders, yoga mats, and dog leashes. Dog leashes can be particularly useful because they can be folded in half to measure one yard, folded in thirds for 2 or 4 feet.
You get the idea. There are plenty of things out there that will help with estimated measurements.

Take your 50 feet of lucky lamp cord and measure 8 feet from the end. Using the aforementioned multi-tool or your knife, cut off the 8-foot section which will leave you with 42 feet.
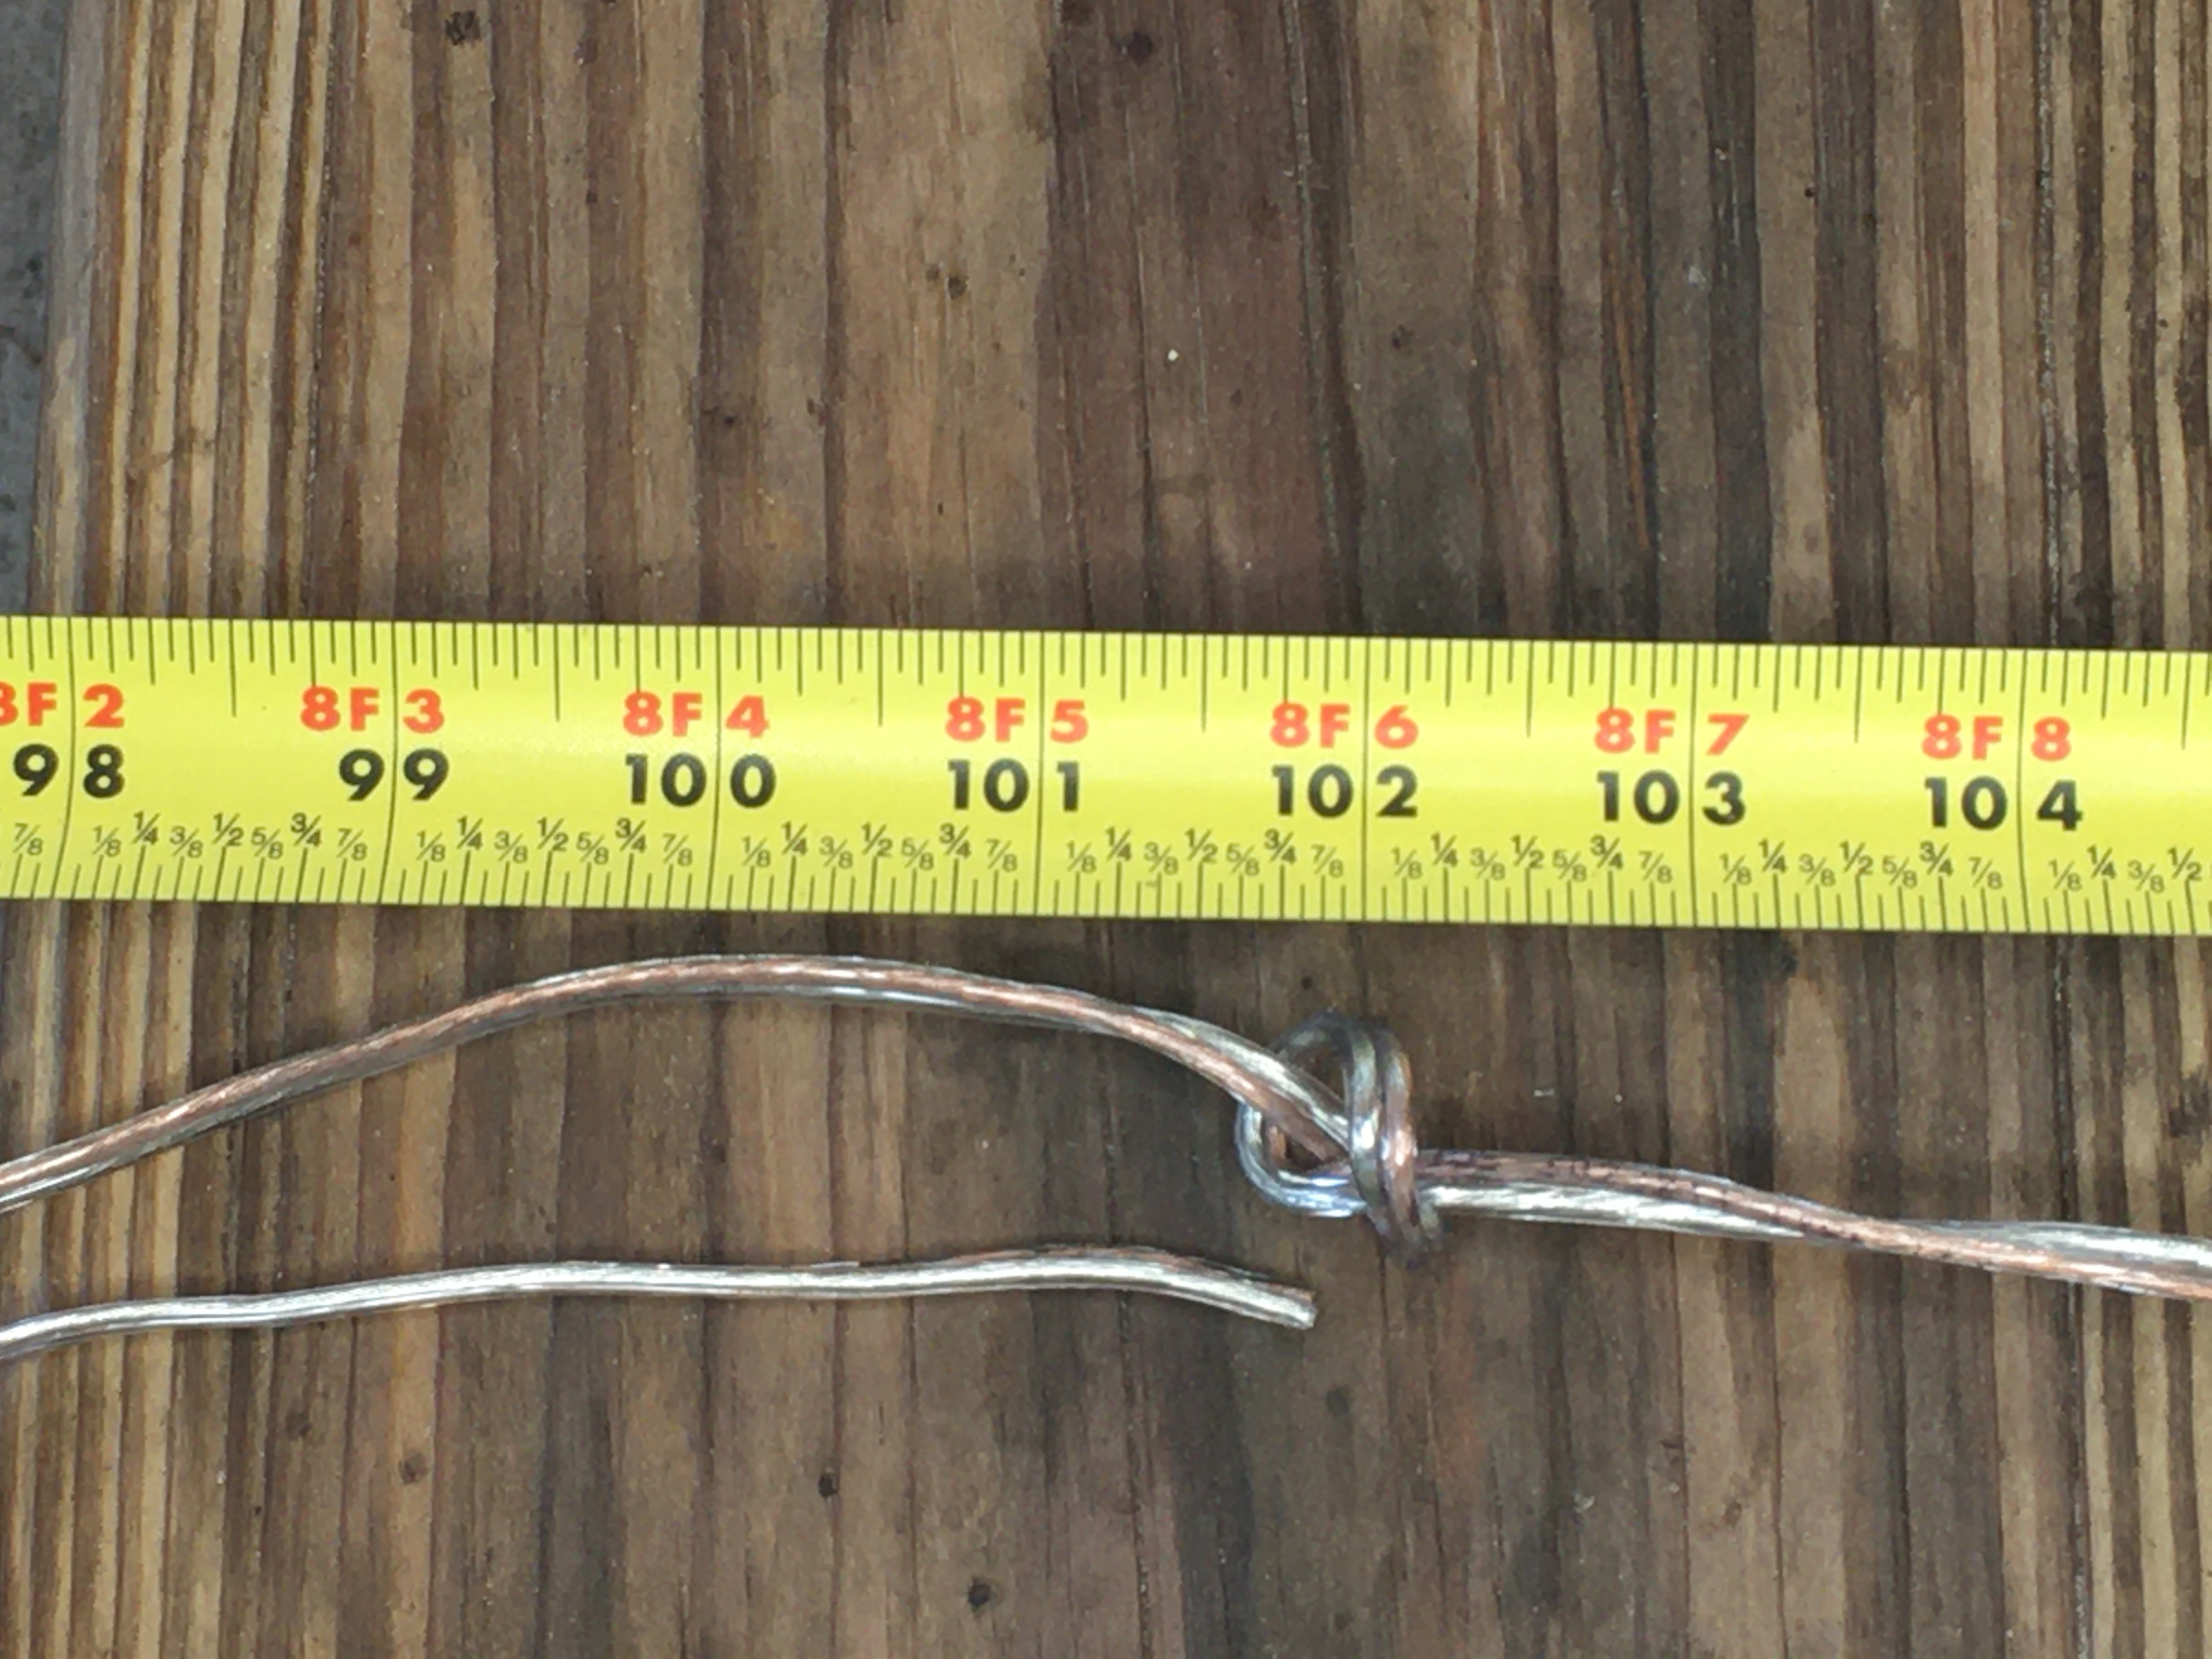
Tie an overhand knot 17 feet from the cut that you just made. My tape measure is only 16 feet long, so I doubled two 8′ 6″ lengths for a total of 17′.
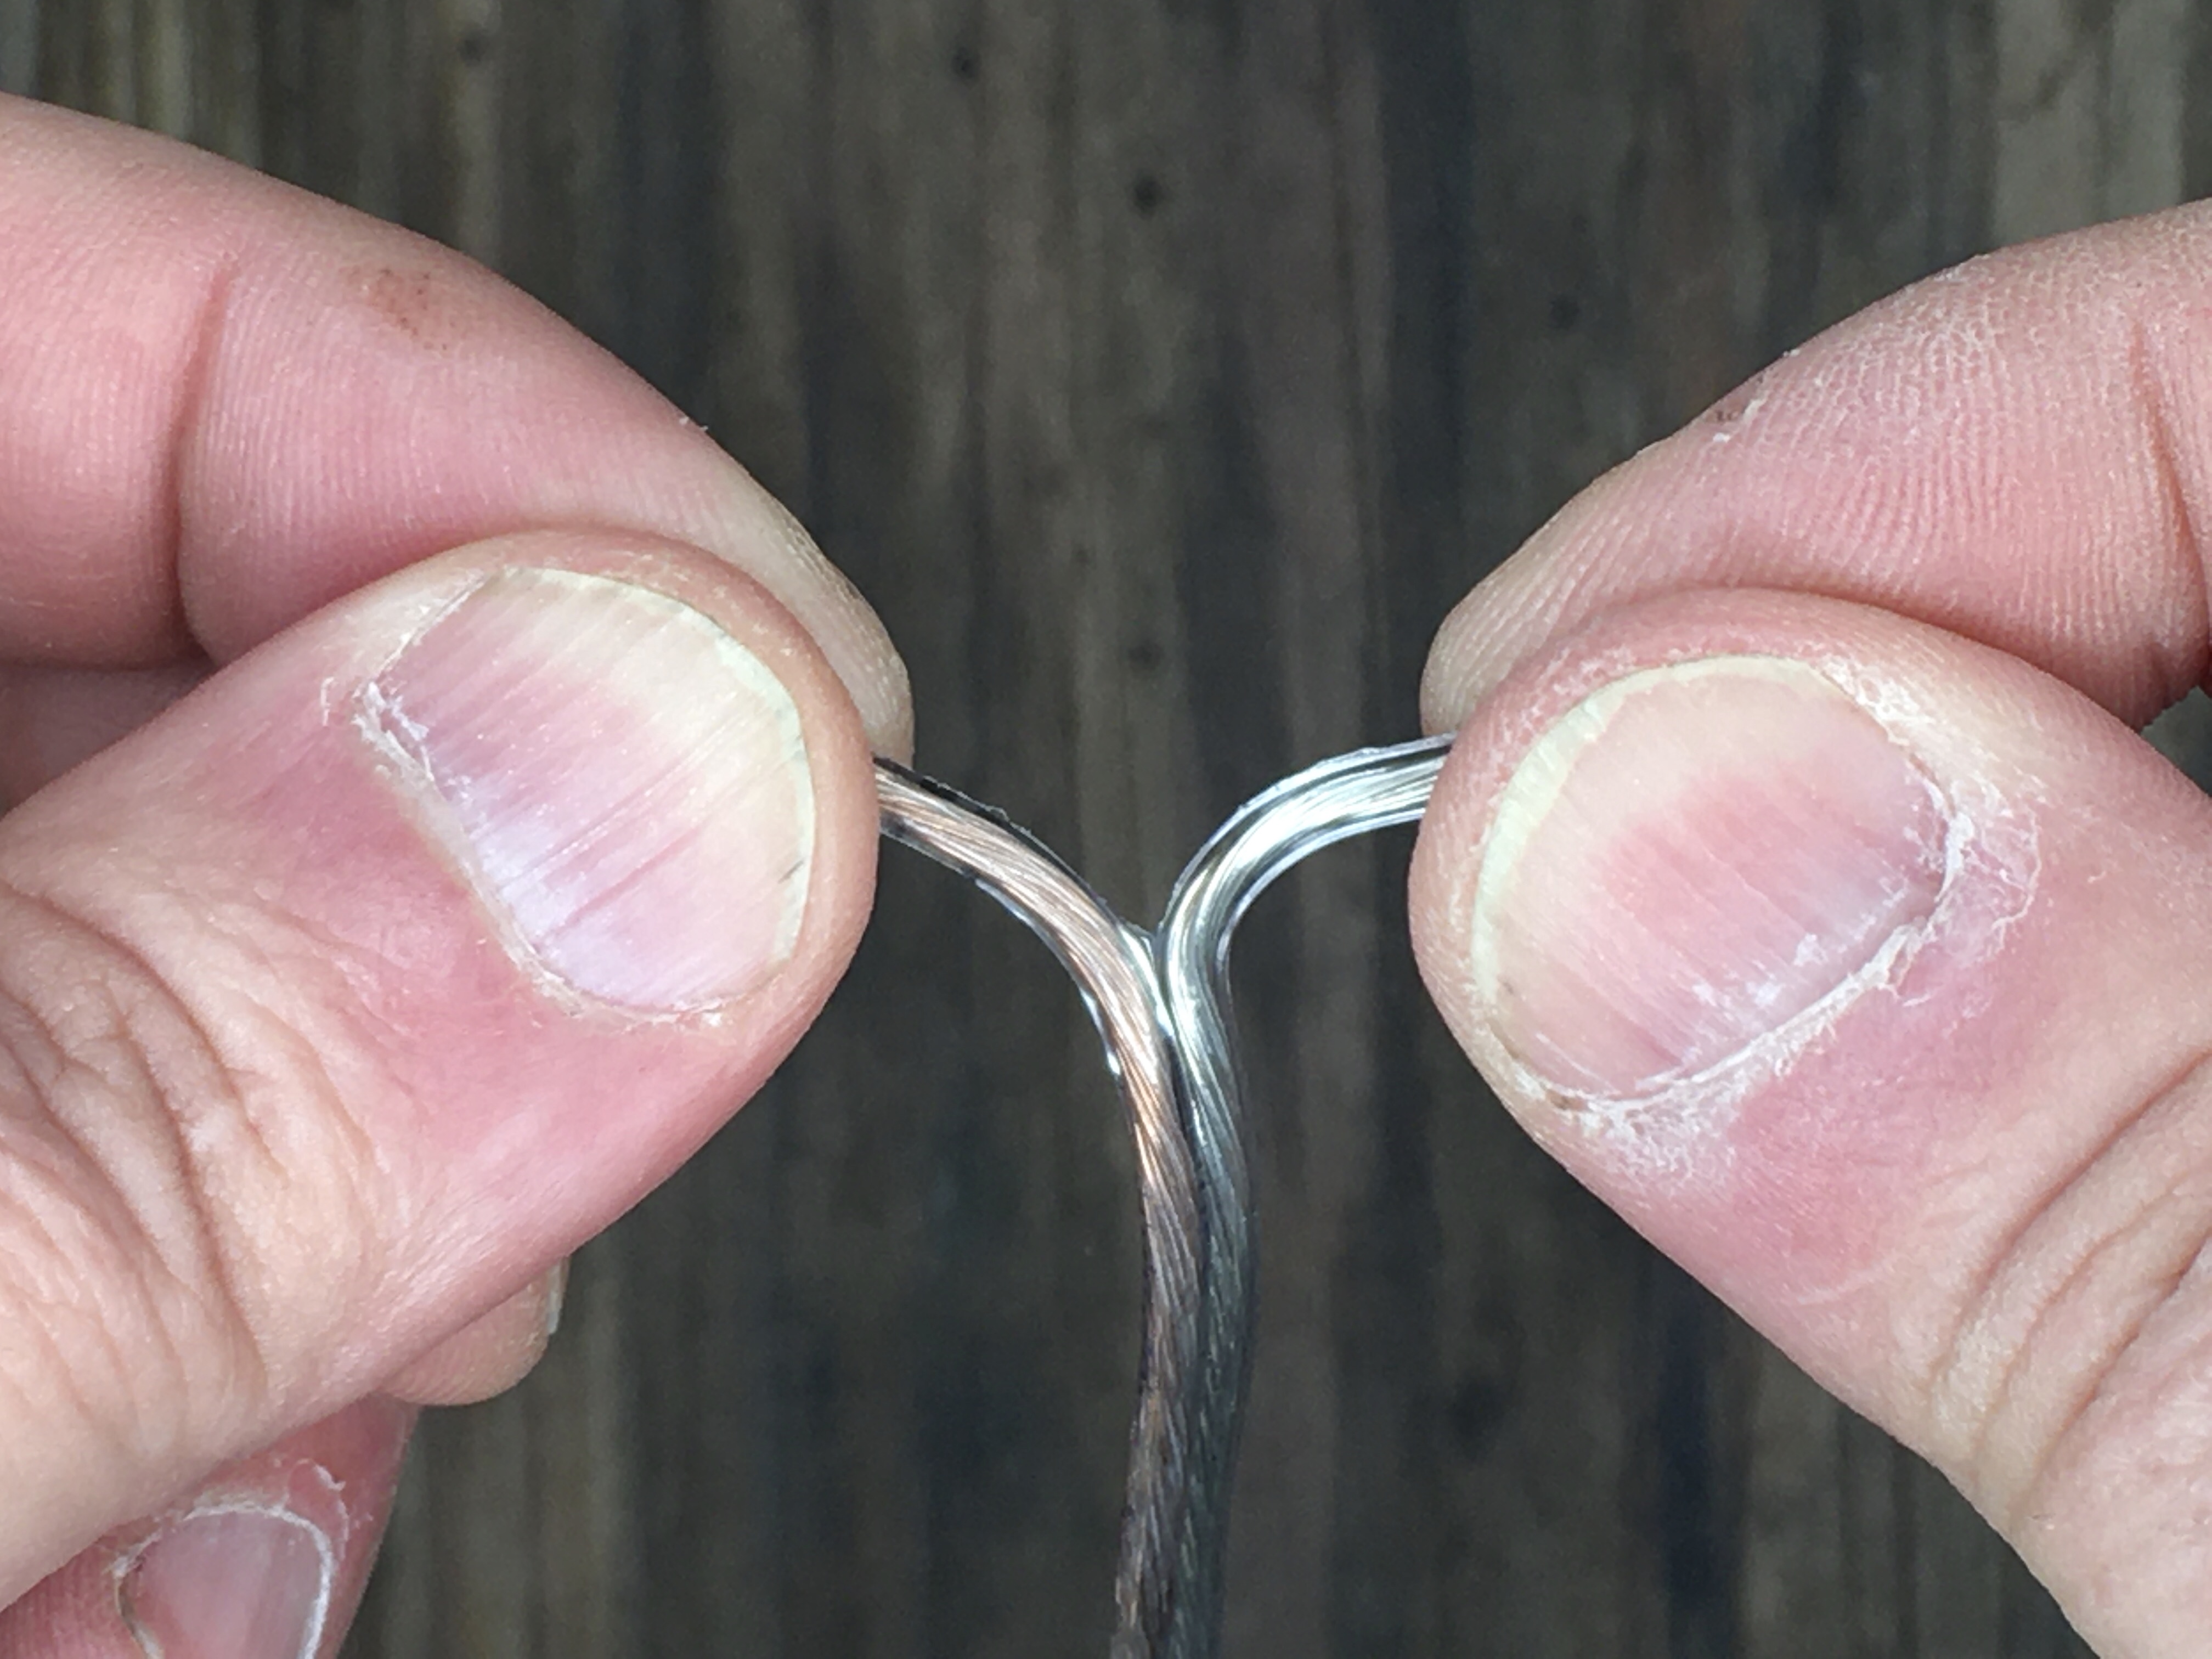
Pinch each wire at the end where you just cutoff the 8-foot section and separate the two wires by pulling them apart much like a zipper. Sometimes a small slice in the connective insulation is needed to start the separation.
Continue “un-zipping” the wires until you reach the overhand knot that you just tied. This creates the two legs of your dipole antenna.
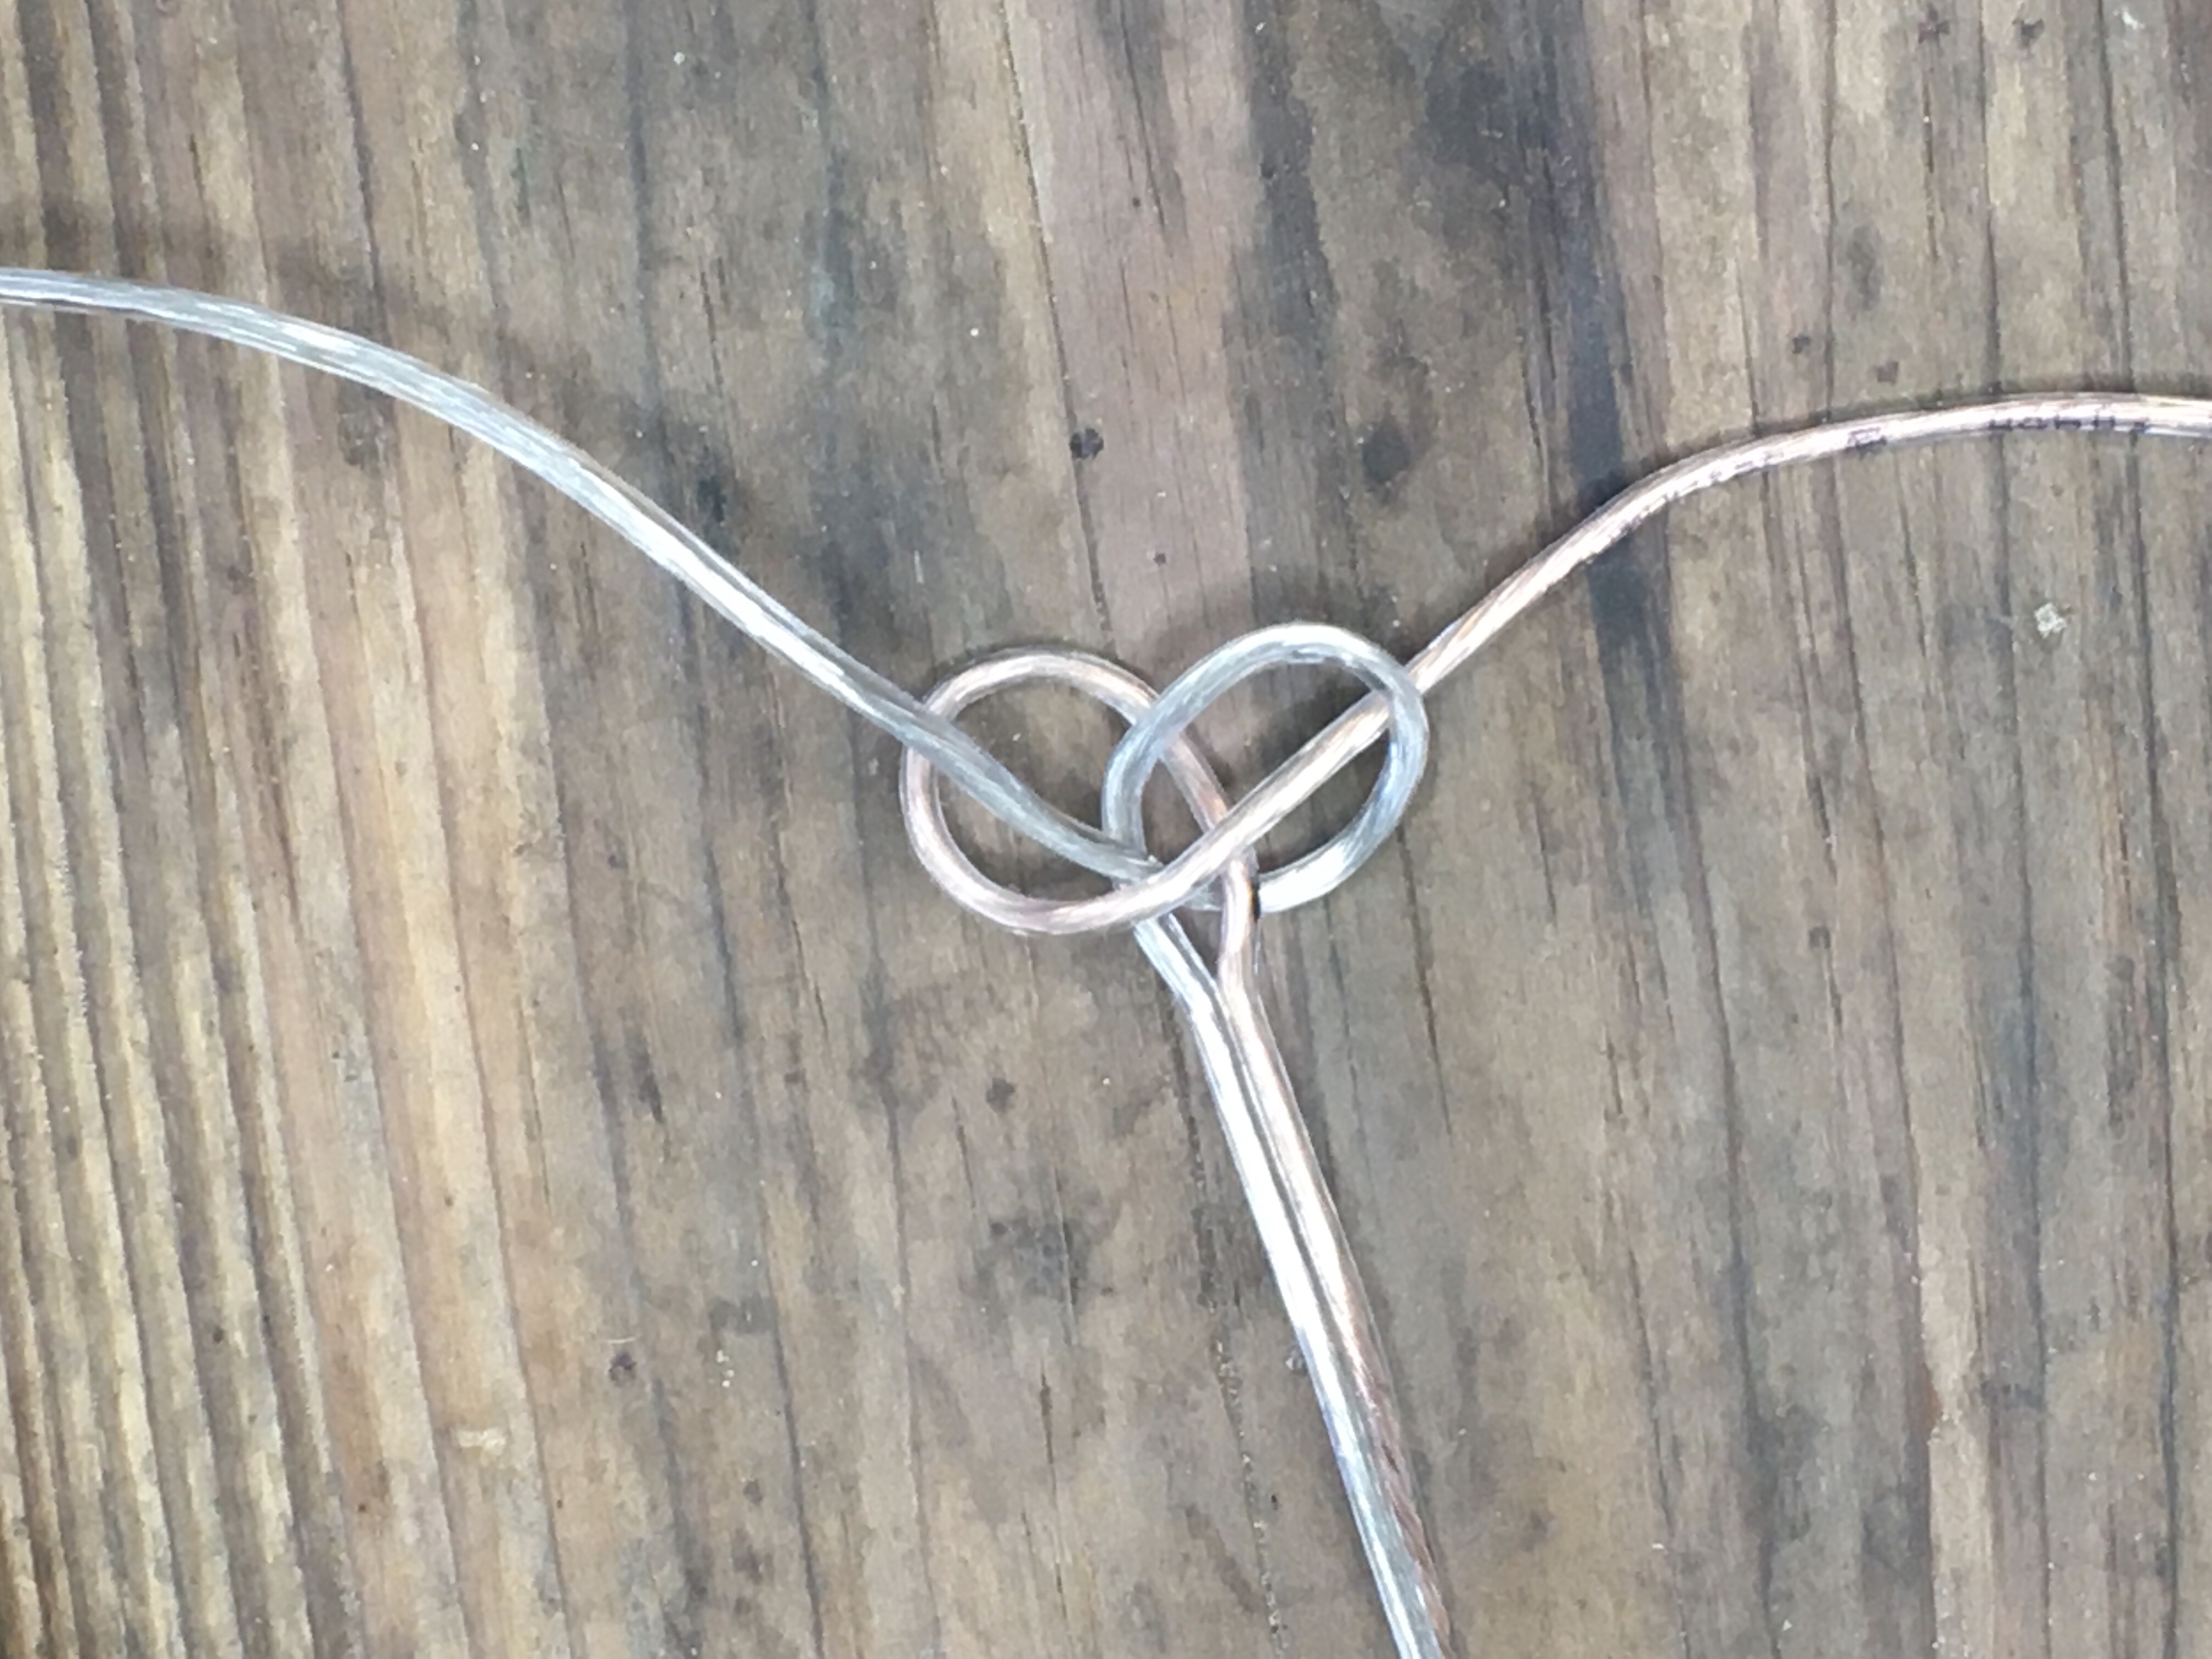
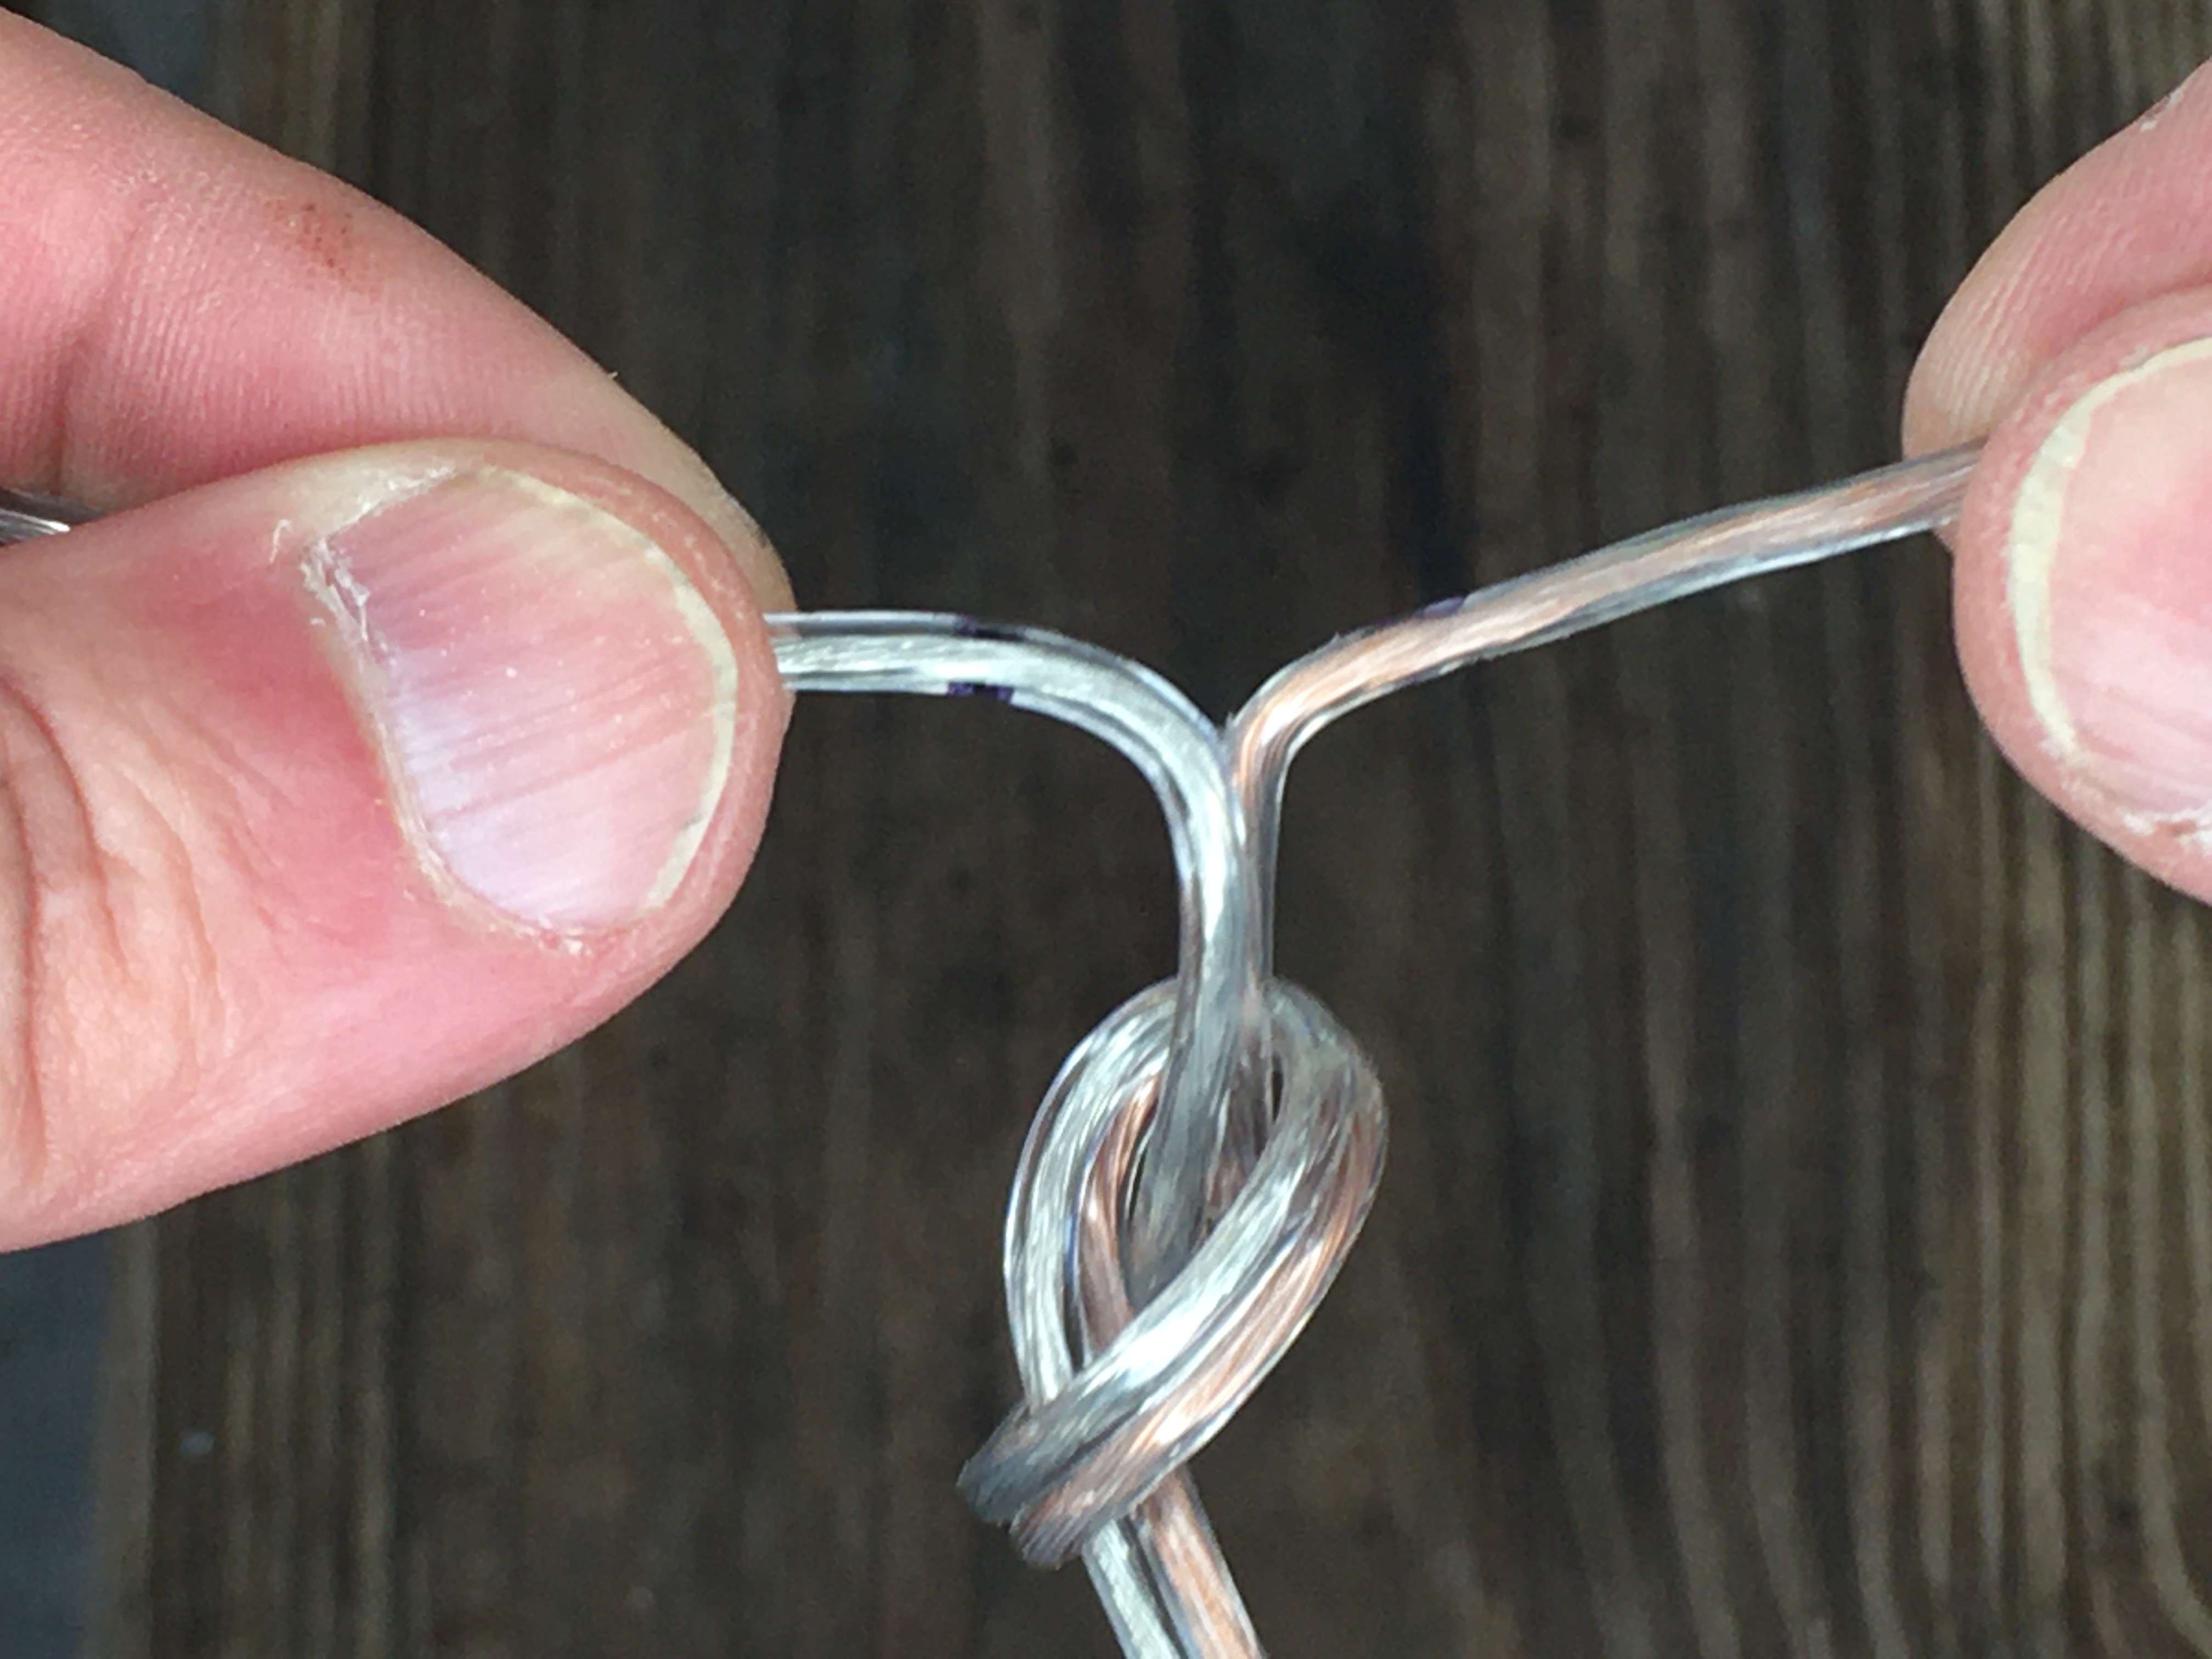
Now, untie the overhand knot and replace it with an electrician’s knot. Lay out the two legs in opposite directions. The length of wire still connected to each other is the feed line (twin lead).

“Unzip” about 6 inches of the lamp cord wires at the other end, opposite from the electrician’s knot. Use your multi-tool to strip about ½ inch of insulation away from each wire. This is the end that will attach to your radio. Twist the braids of the wire so that they don’t fray.
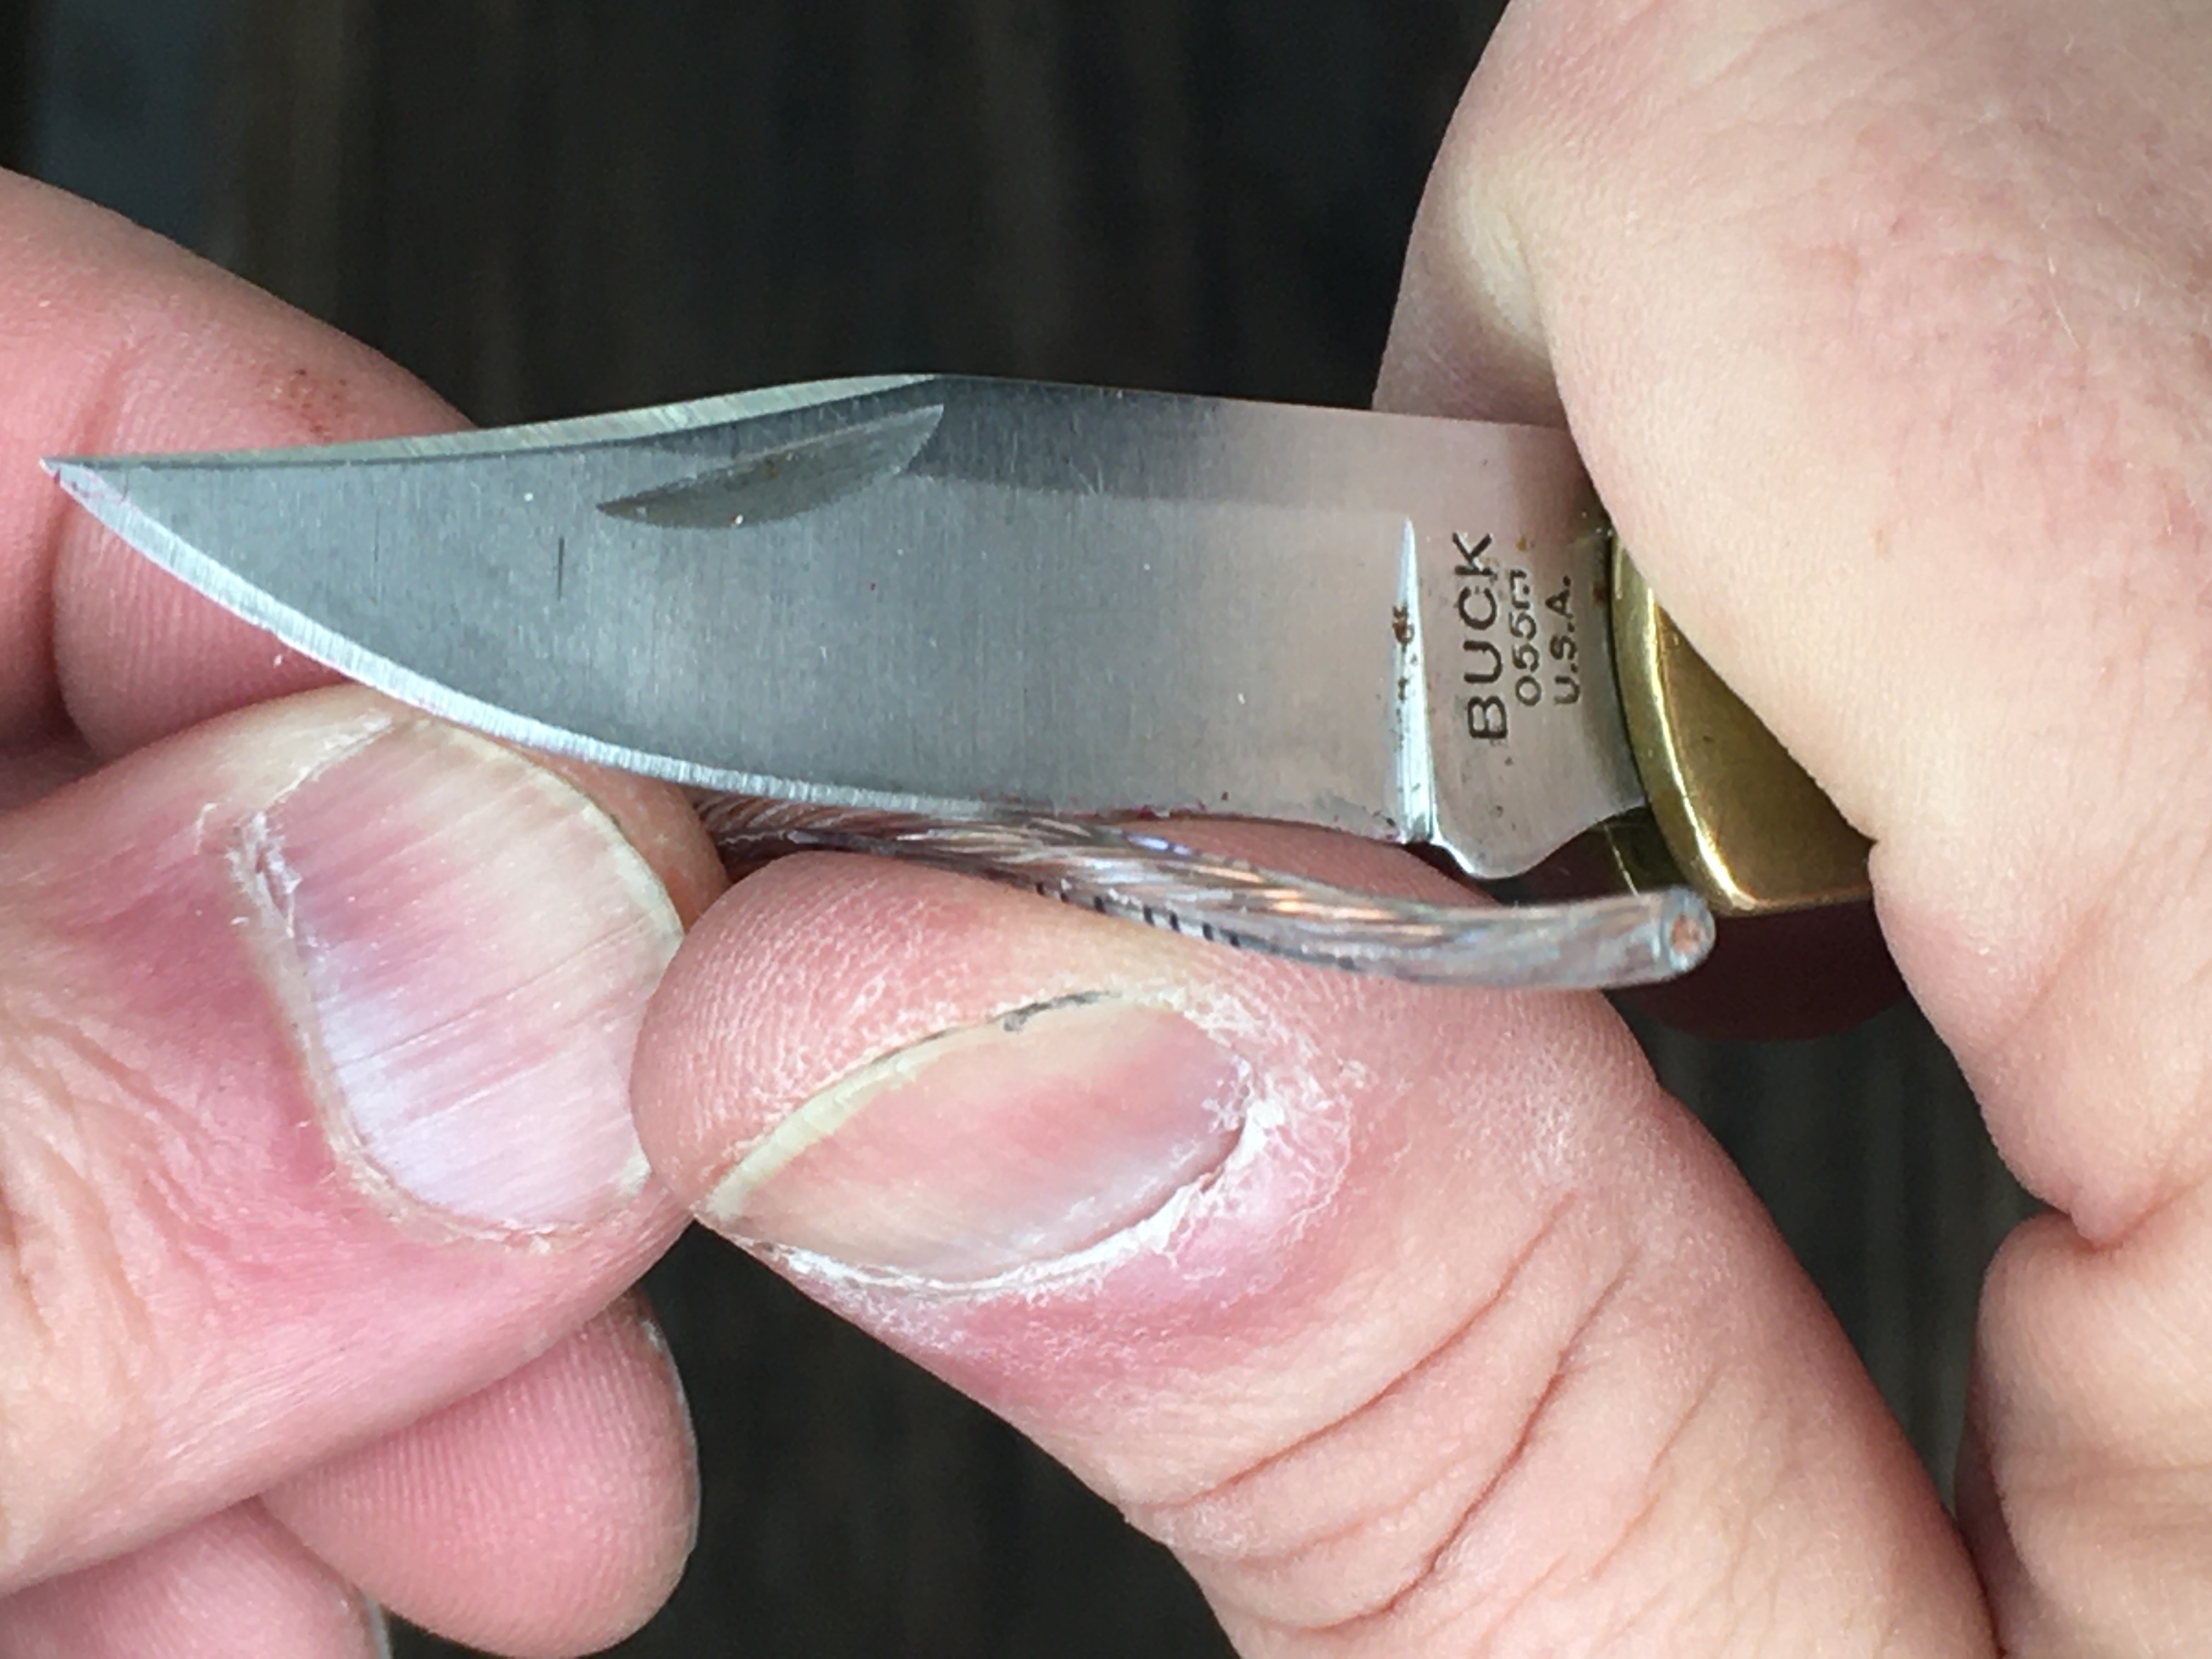
If you don’t have multi-tool, the you can use a knife. Simply score the insulation around the circumference of the wire until the blade cuts through the insulation and barely touches the wire. Then pull the insulation off with a twisting motion.
A few words for the perfectionists, SWR obsessed, aspiring physicists, and general nitpickers: The impedance of this feedline is 100 to 150 ohms. The theoretical impedance of a dipole in free space is 73 ohms, but this dipole is going to be a long way from free space. Also, feedline that is one half electrical wavelength will repeat the impedance of the load. Finally, we don’t need and exact match for this antenna. We just need close enough to not blow up the finals or force the radio to throttle the power.
How to Make a Dipole Antenna – ERECT IT
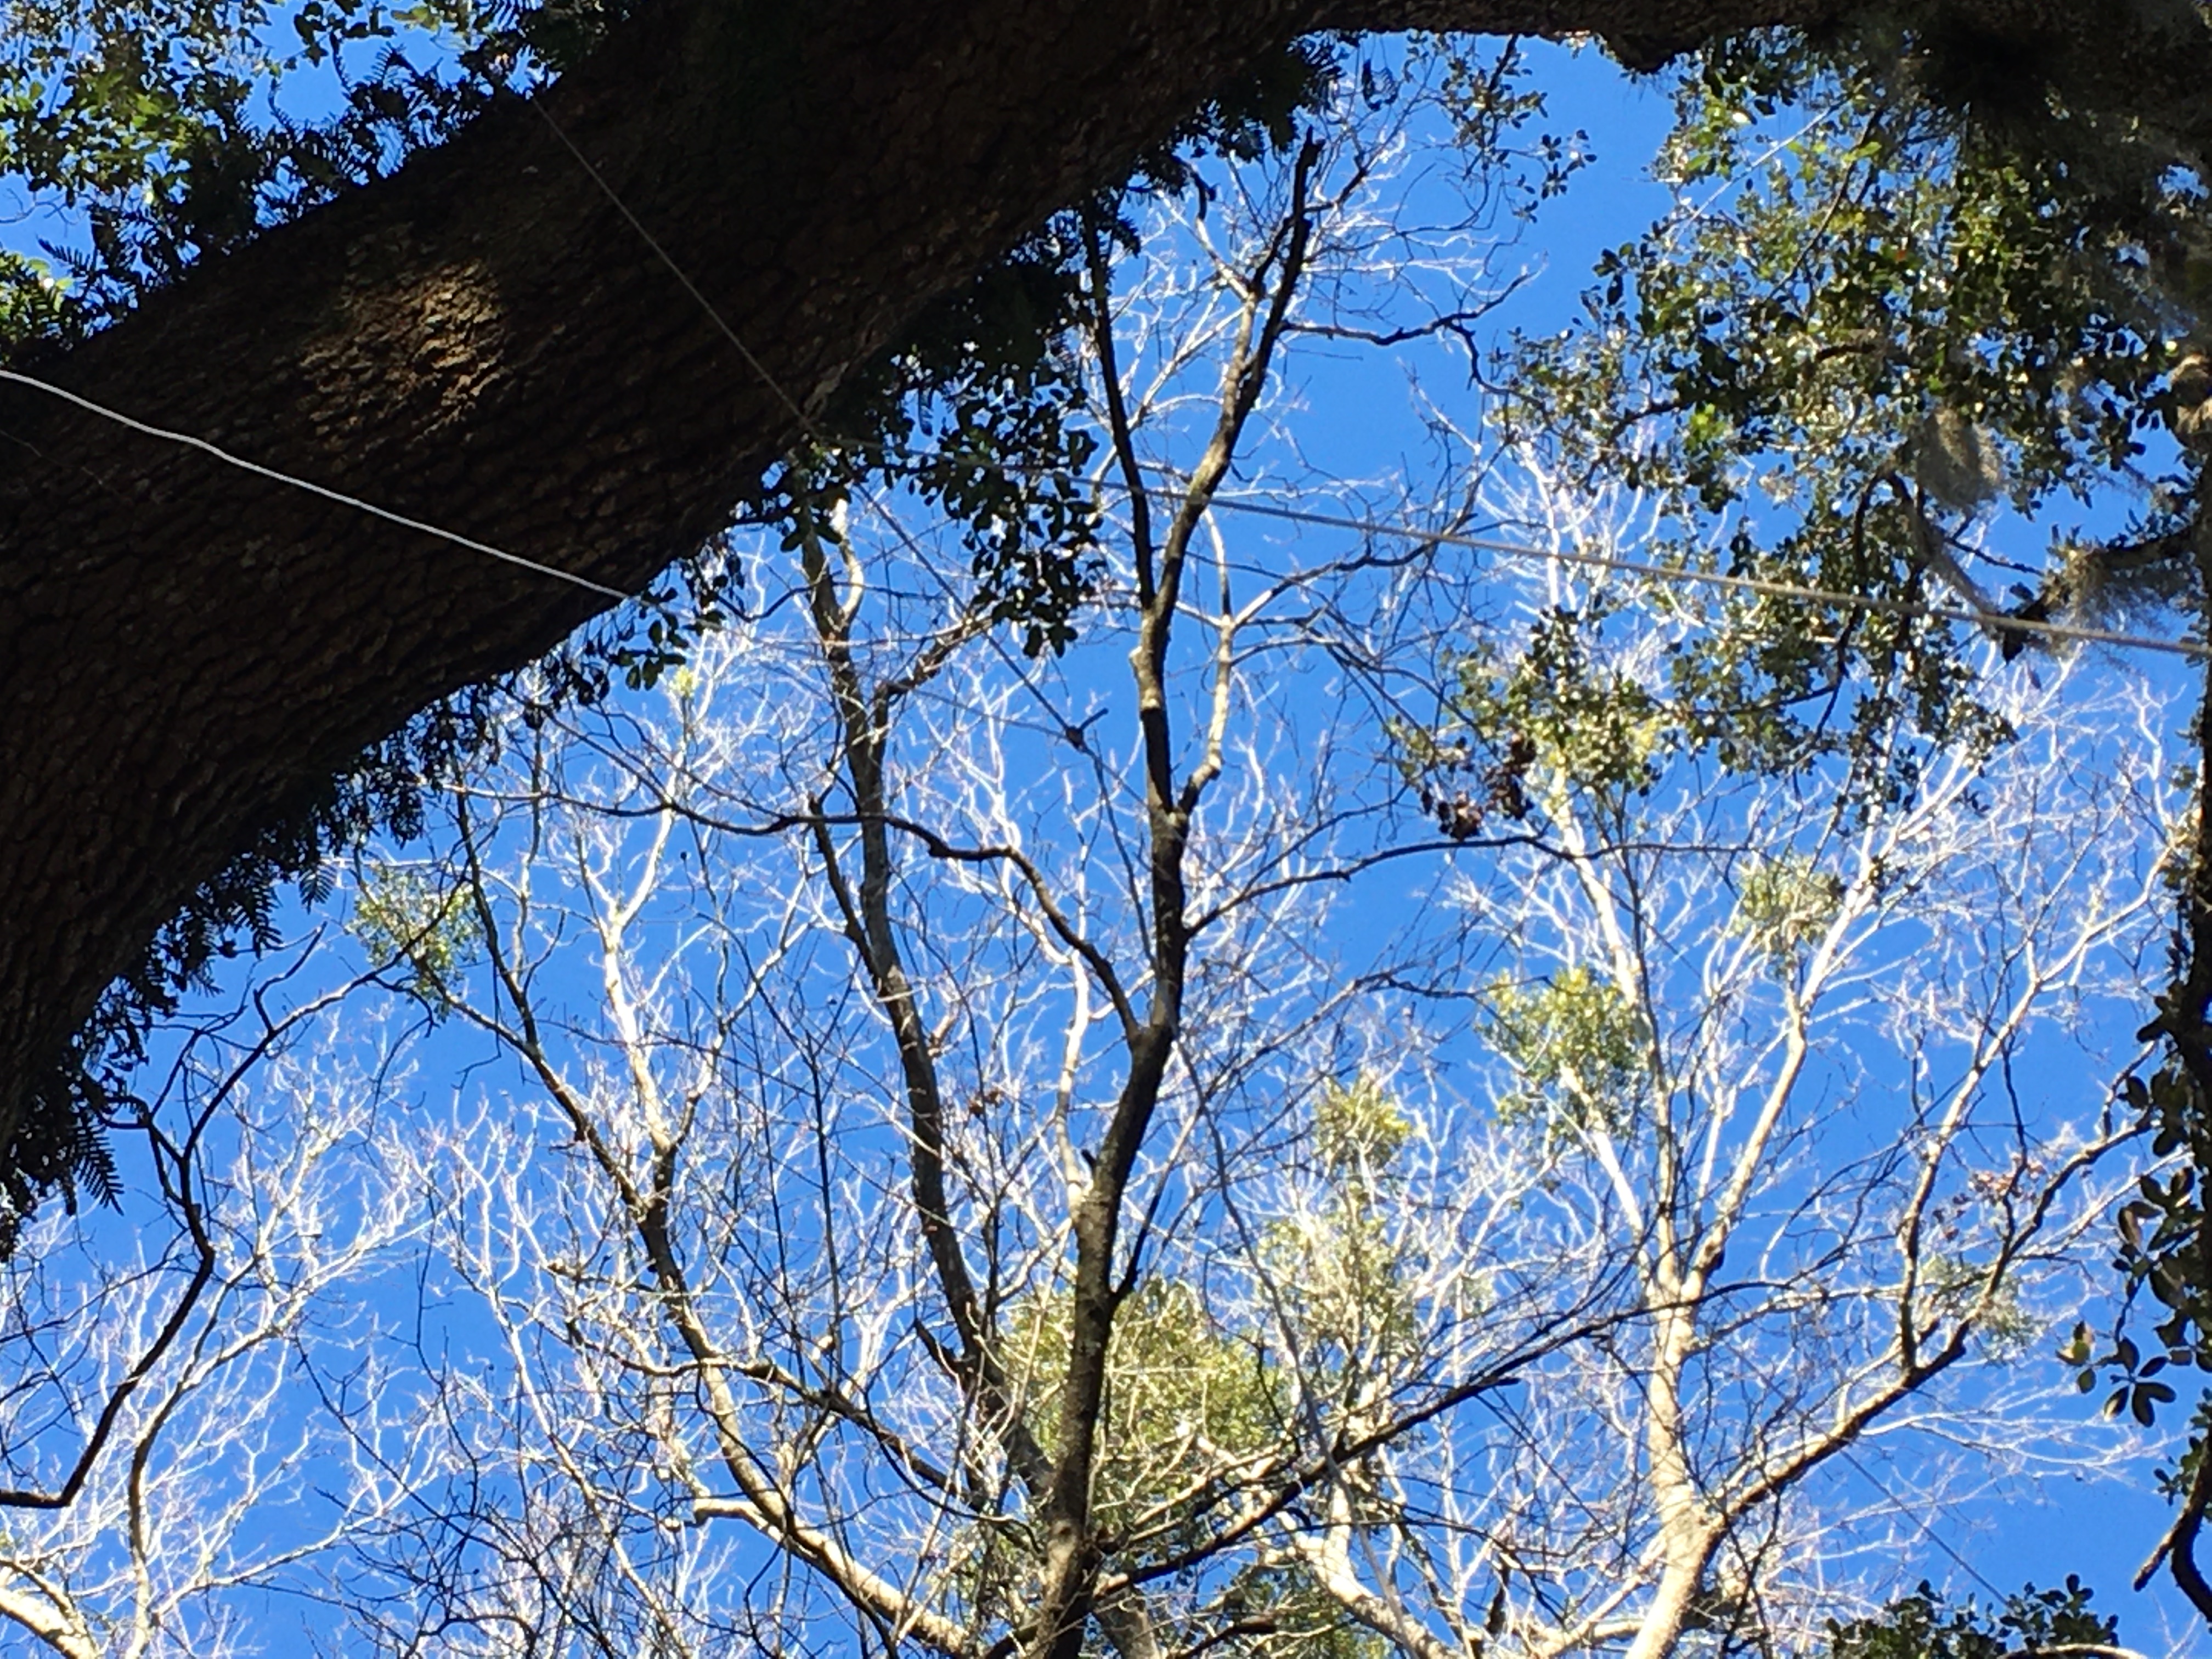
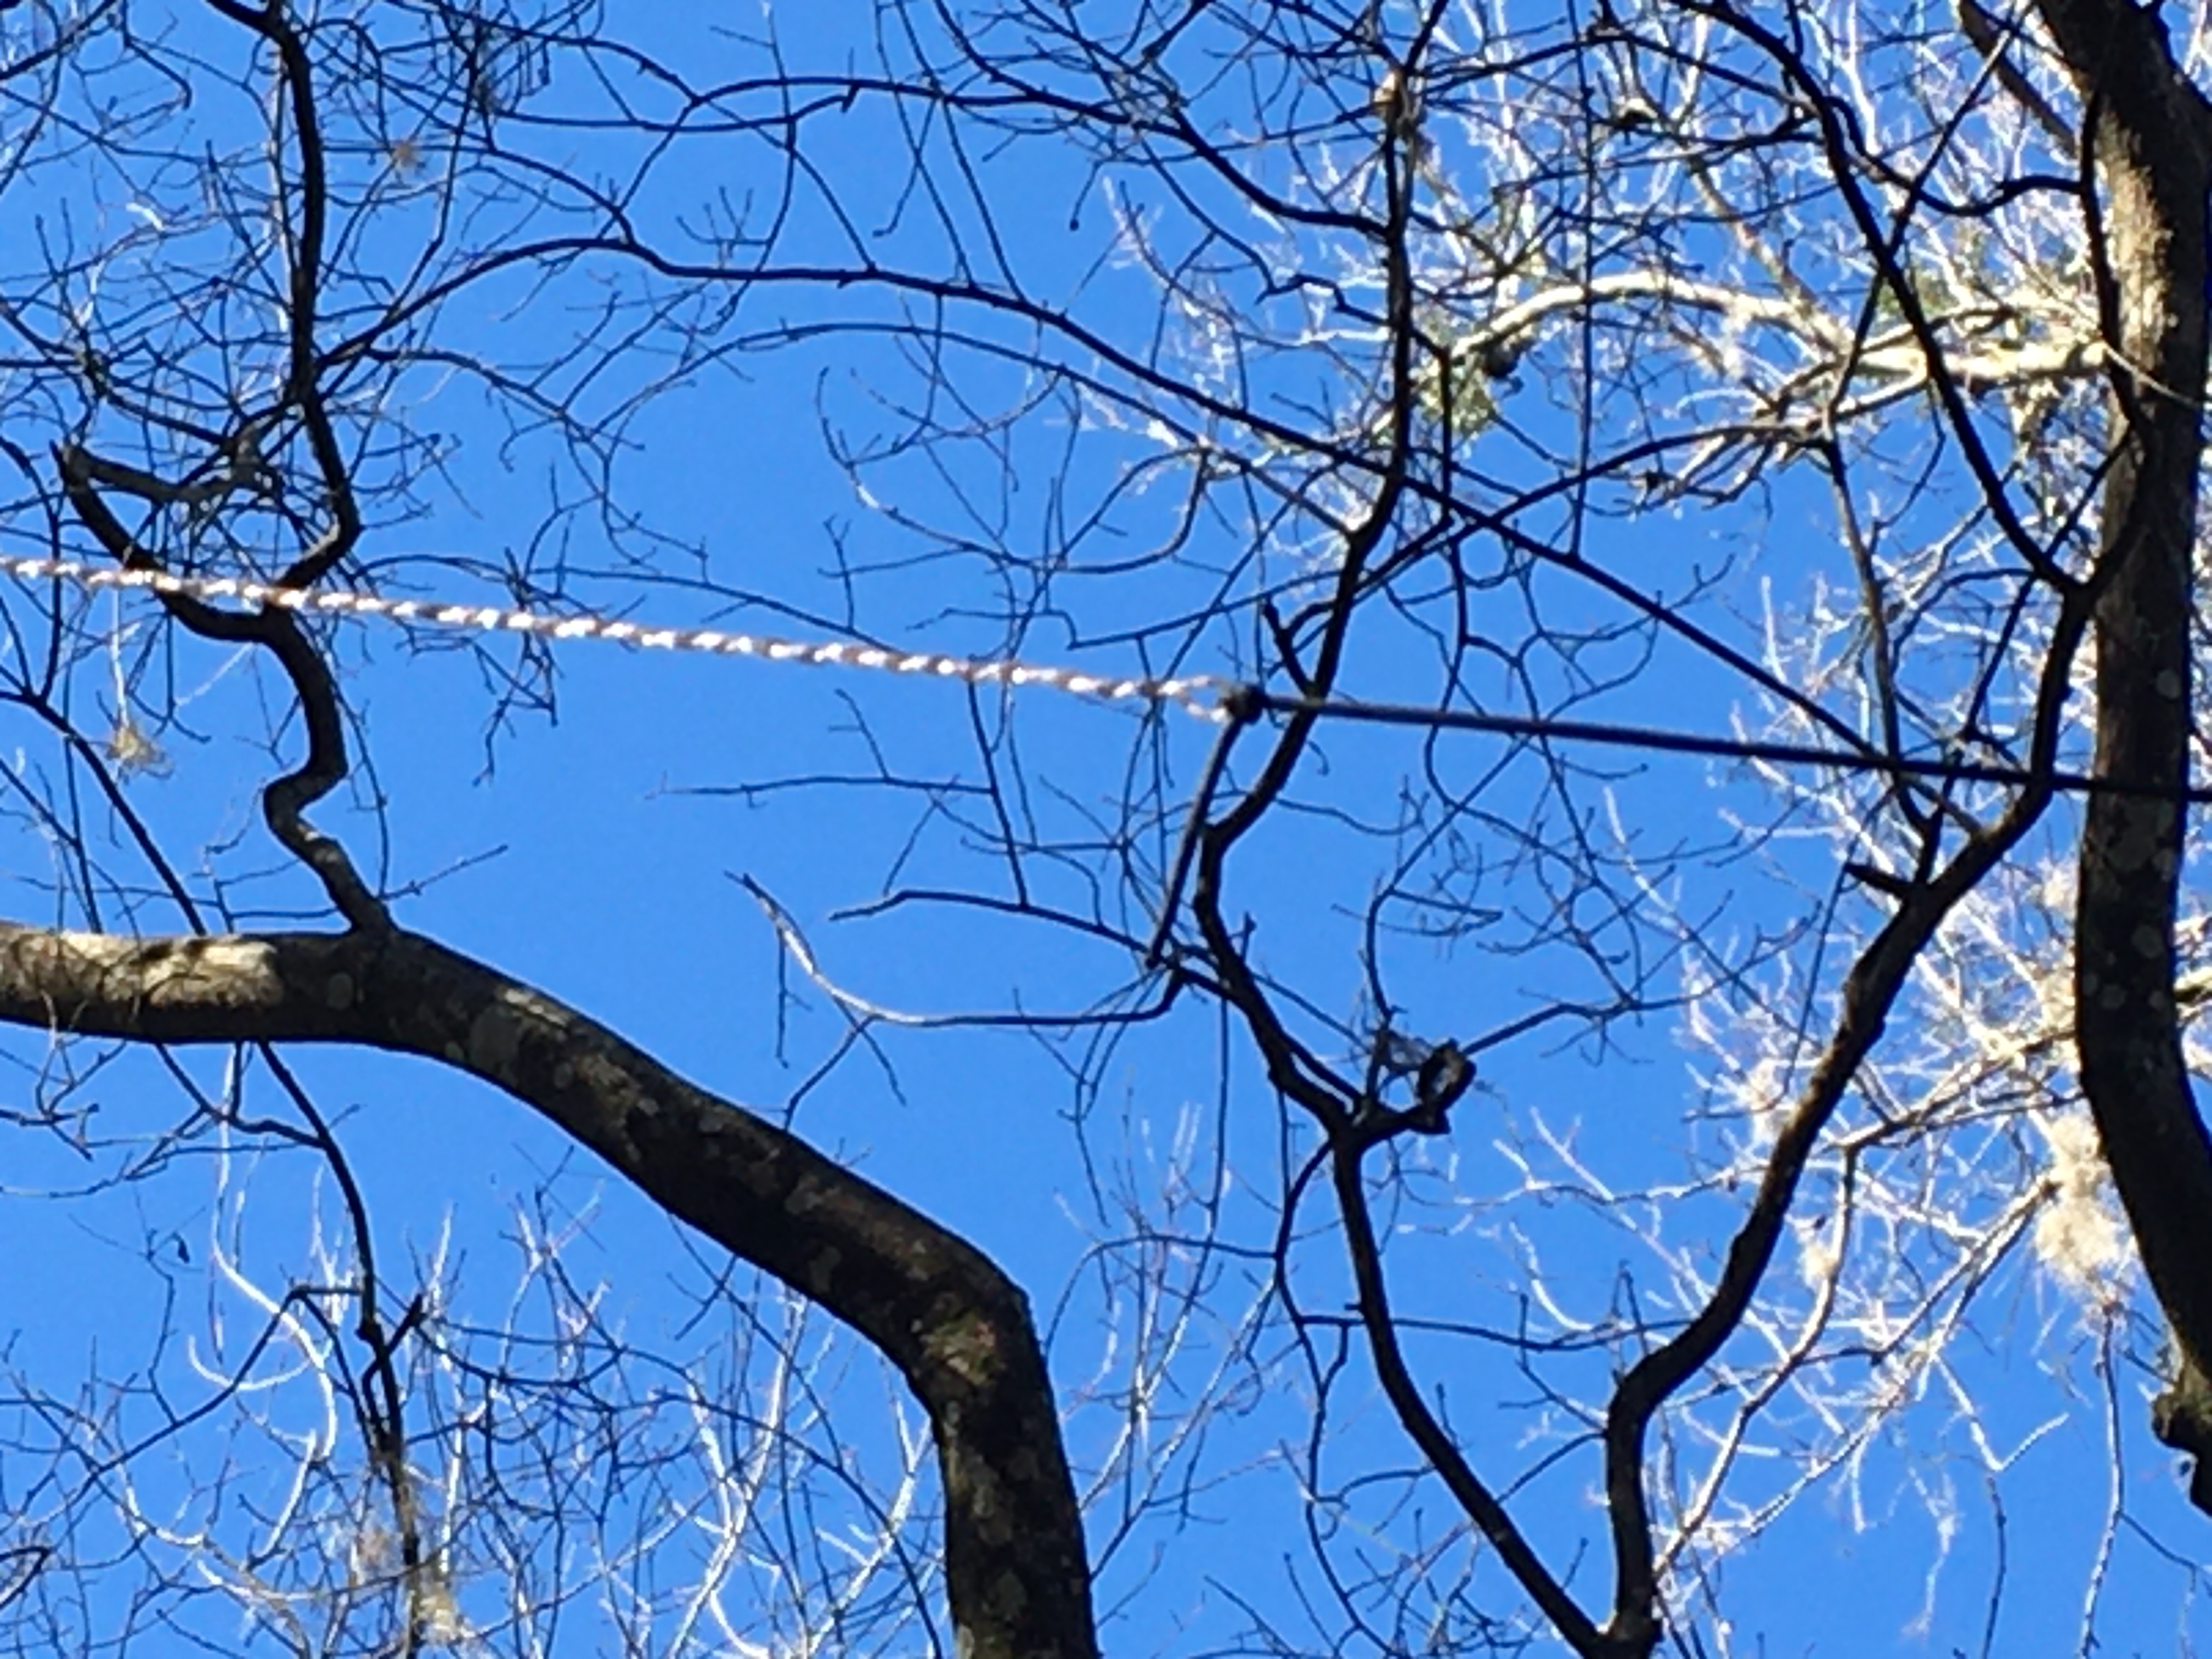
The easiest way to get a wire antenna in the air is to throw some cordage over a tree branch and pull the wire up. It’s like hanging a bear bag. (Hanging a bear bag is a mandatory pre-emptive survival skill. Here’s a great post demonstrating my favorite technique, the PCT method.)
I prefer paracord for hanging a bear bag or antenna, but any rope will do. Tie an overhand loop knot in the end of the cordage, clip a carabiner through the loop, and do your best David fighting Goliath imitation to slink it over a branch.
Ideally, the branch should be at least as high as the feed line is long (1/2 wavelength), but we need some slack in the feed line to run to the radio, so anything about 15 feet high should work. That will leave about 10 feet to run to the radio.
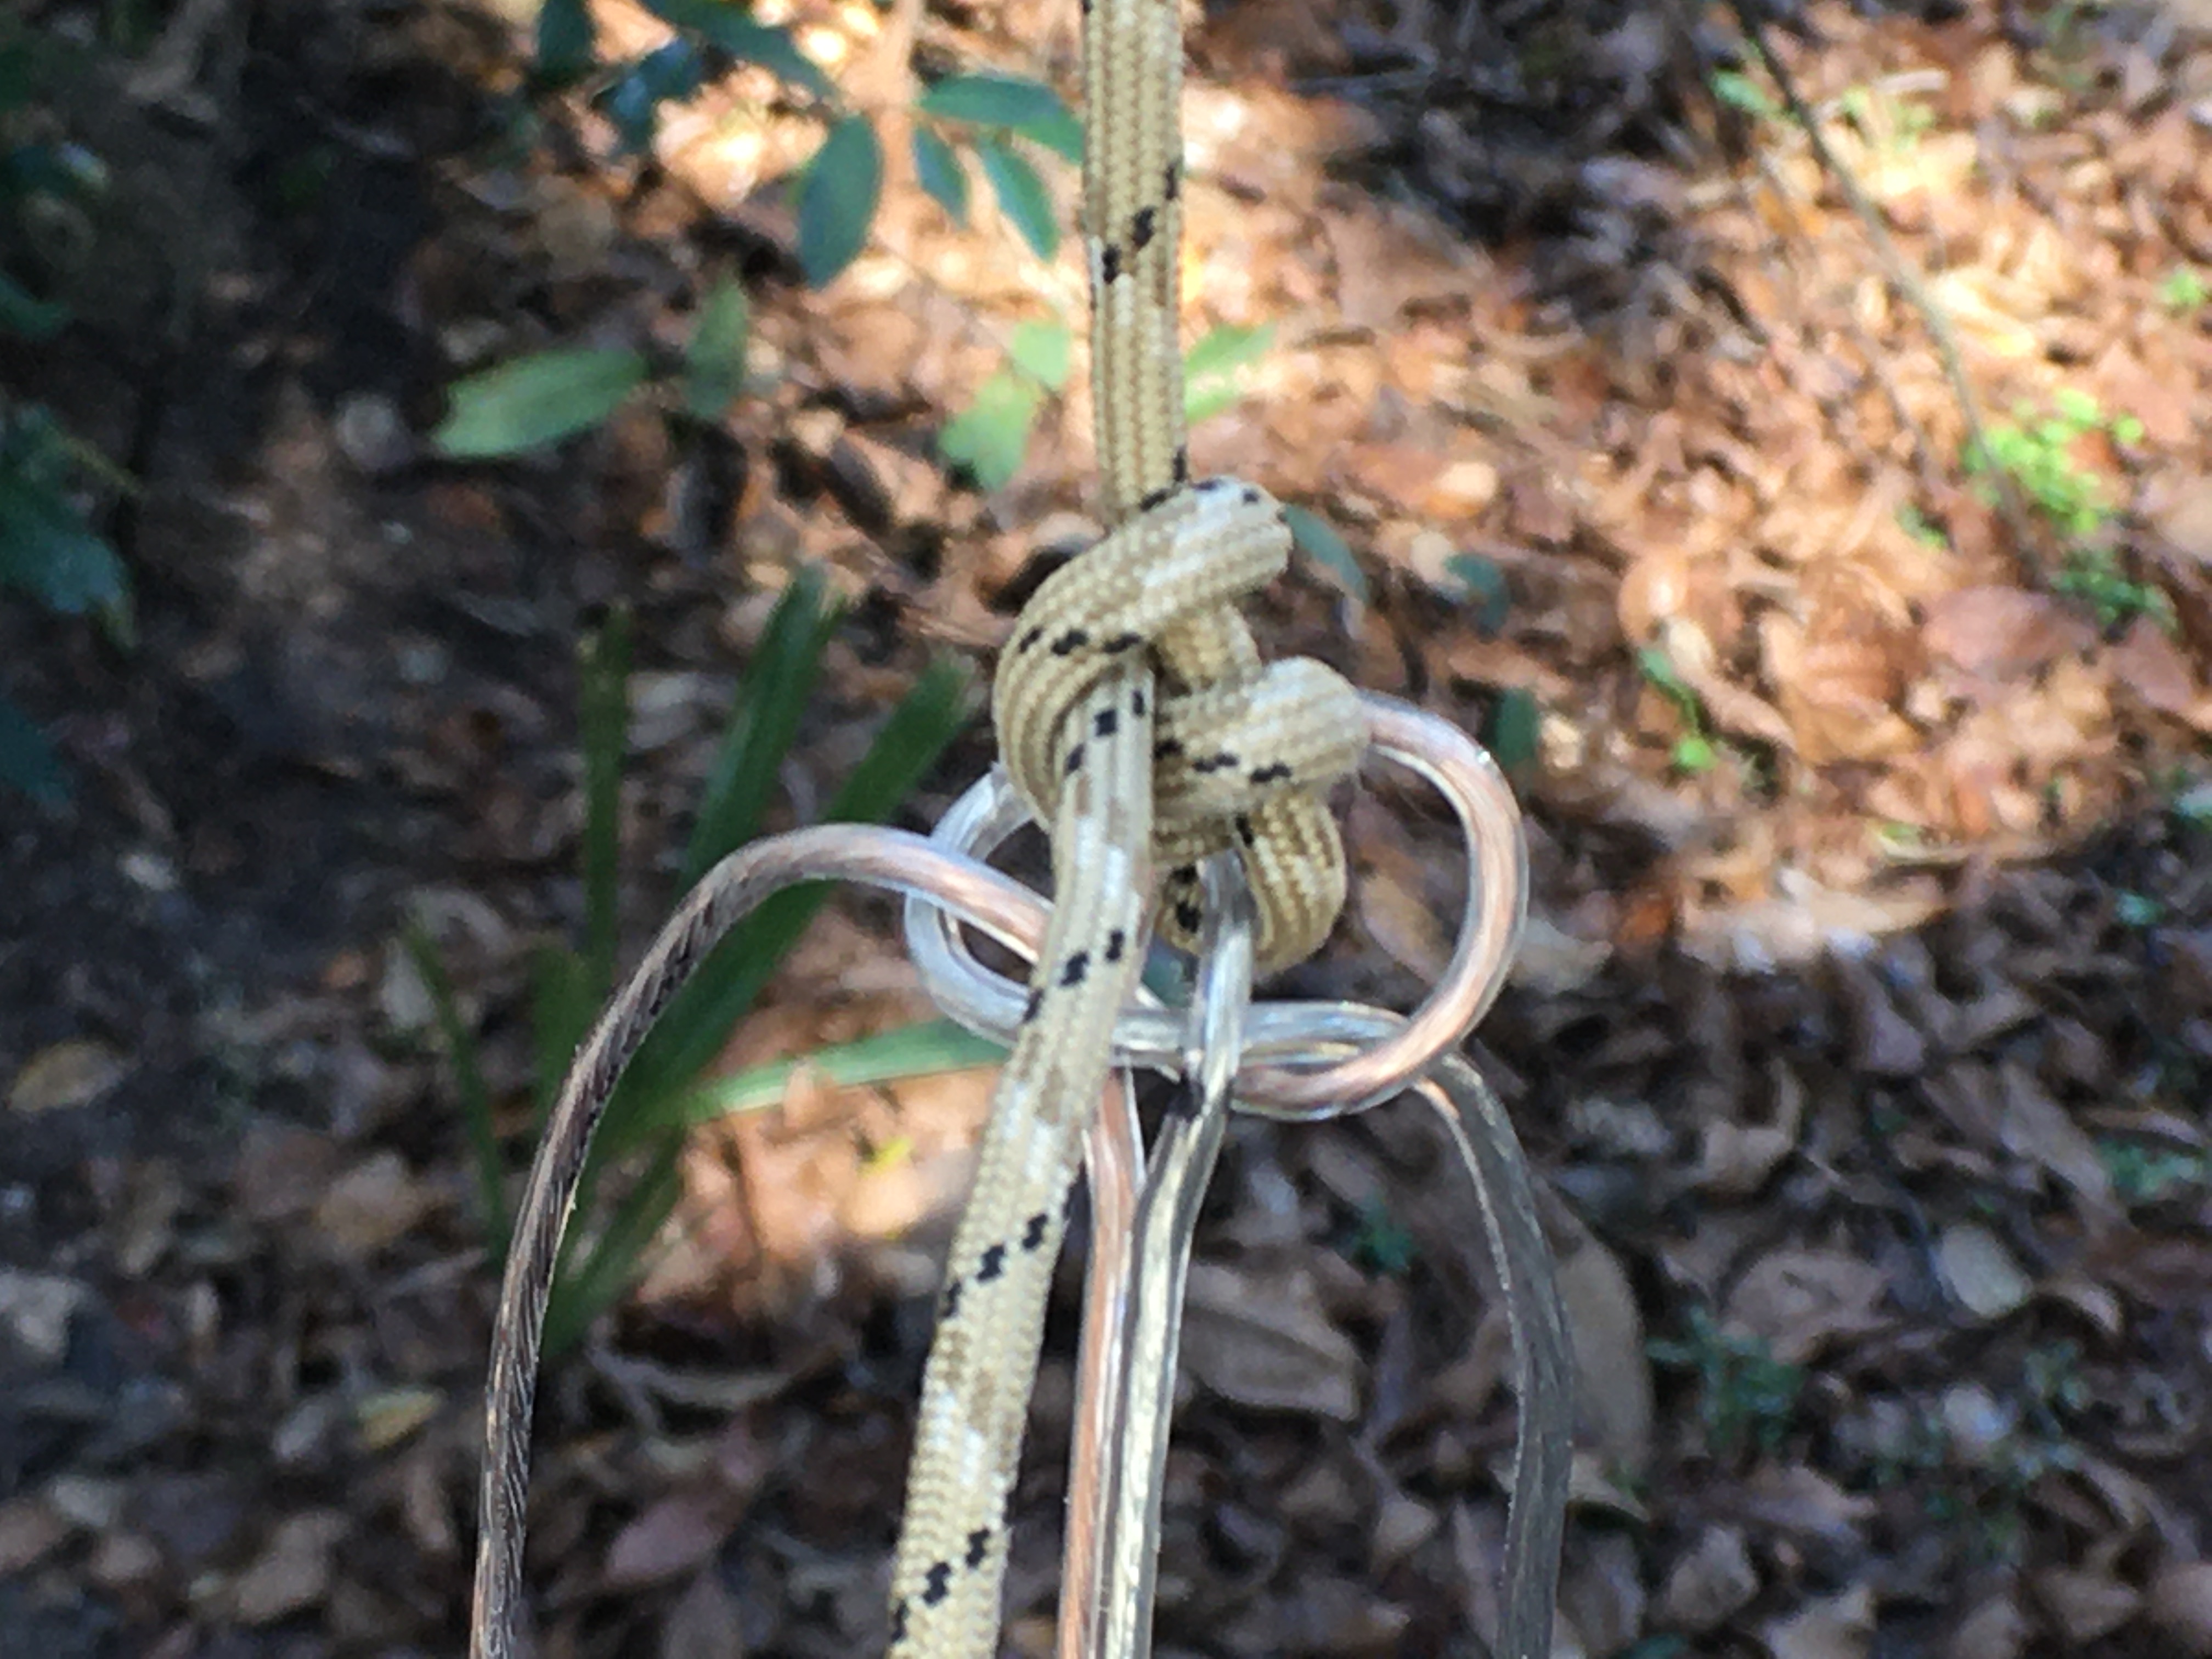
Attach the cordage to the center point of the antenna, where you tied the electrician’s knot, with an overhand knot or two half hitches. Then hoist the center point up to about 15 feet. The ends of the dipole antenna should drape down low enough for you to reach and attach cordage. In most cases the ends of the legs are attached to insulators which are attached to supporting ropes. Insulators aren’t necessary for the relatively low power transmissions we use in the field.
Tie off the cordage for the antenna center point to the trunk of the tree. I use an Evenk hitch.
My preferred method of suspending the ends of this antenna is to reverse-wrap about a foot of wire back on itself. Remember that we cut the wire a bit long for adjustments, if needed. The usual practice is to erect an antenna, measure the SWR and then cut the ends of the wire as needed. Reverse-wrapping the wire also shortens it electrically (without committing to a cut) and provides a tie-off point. Keep in mind that the electrical length of a reverse-wrapped wire is longer that the physical length, but using this method helps avoid cutting too much off.
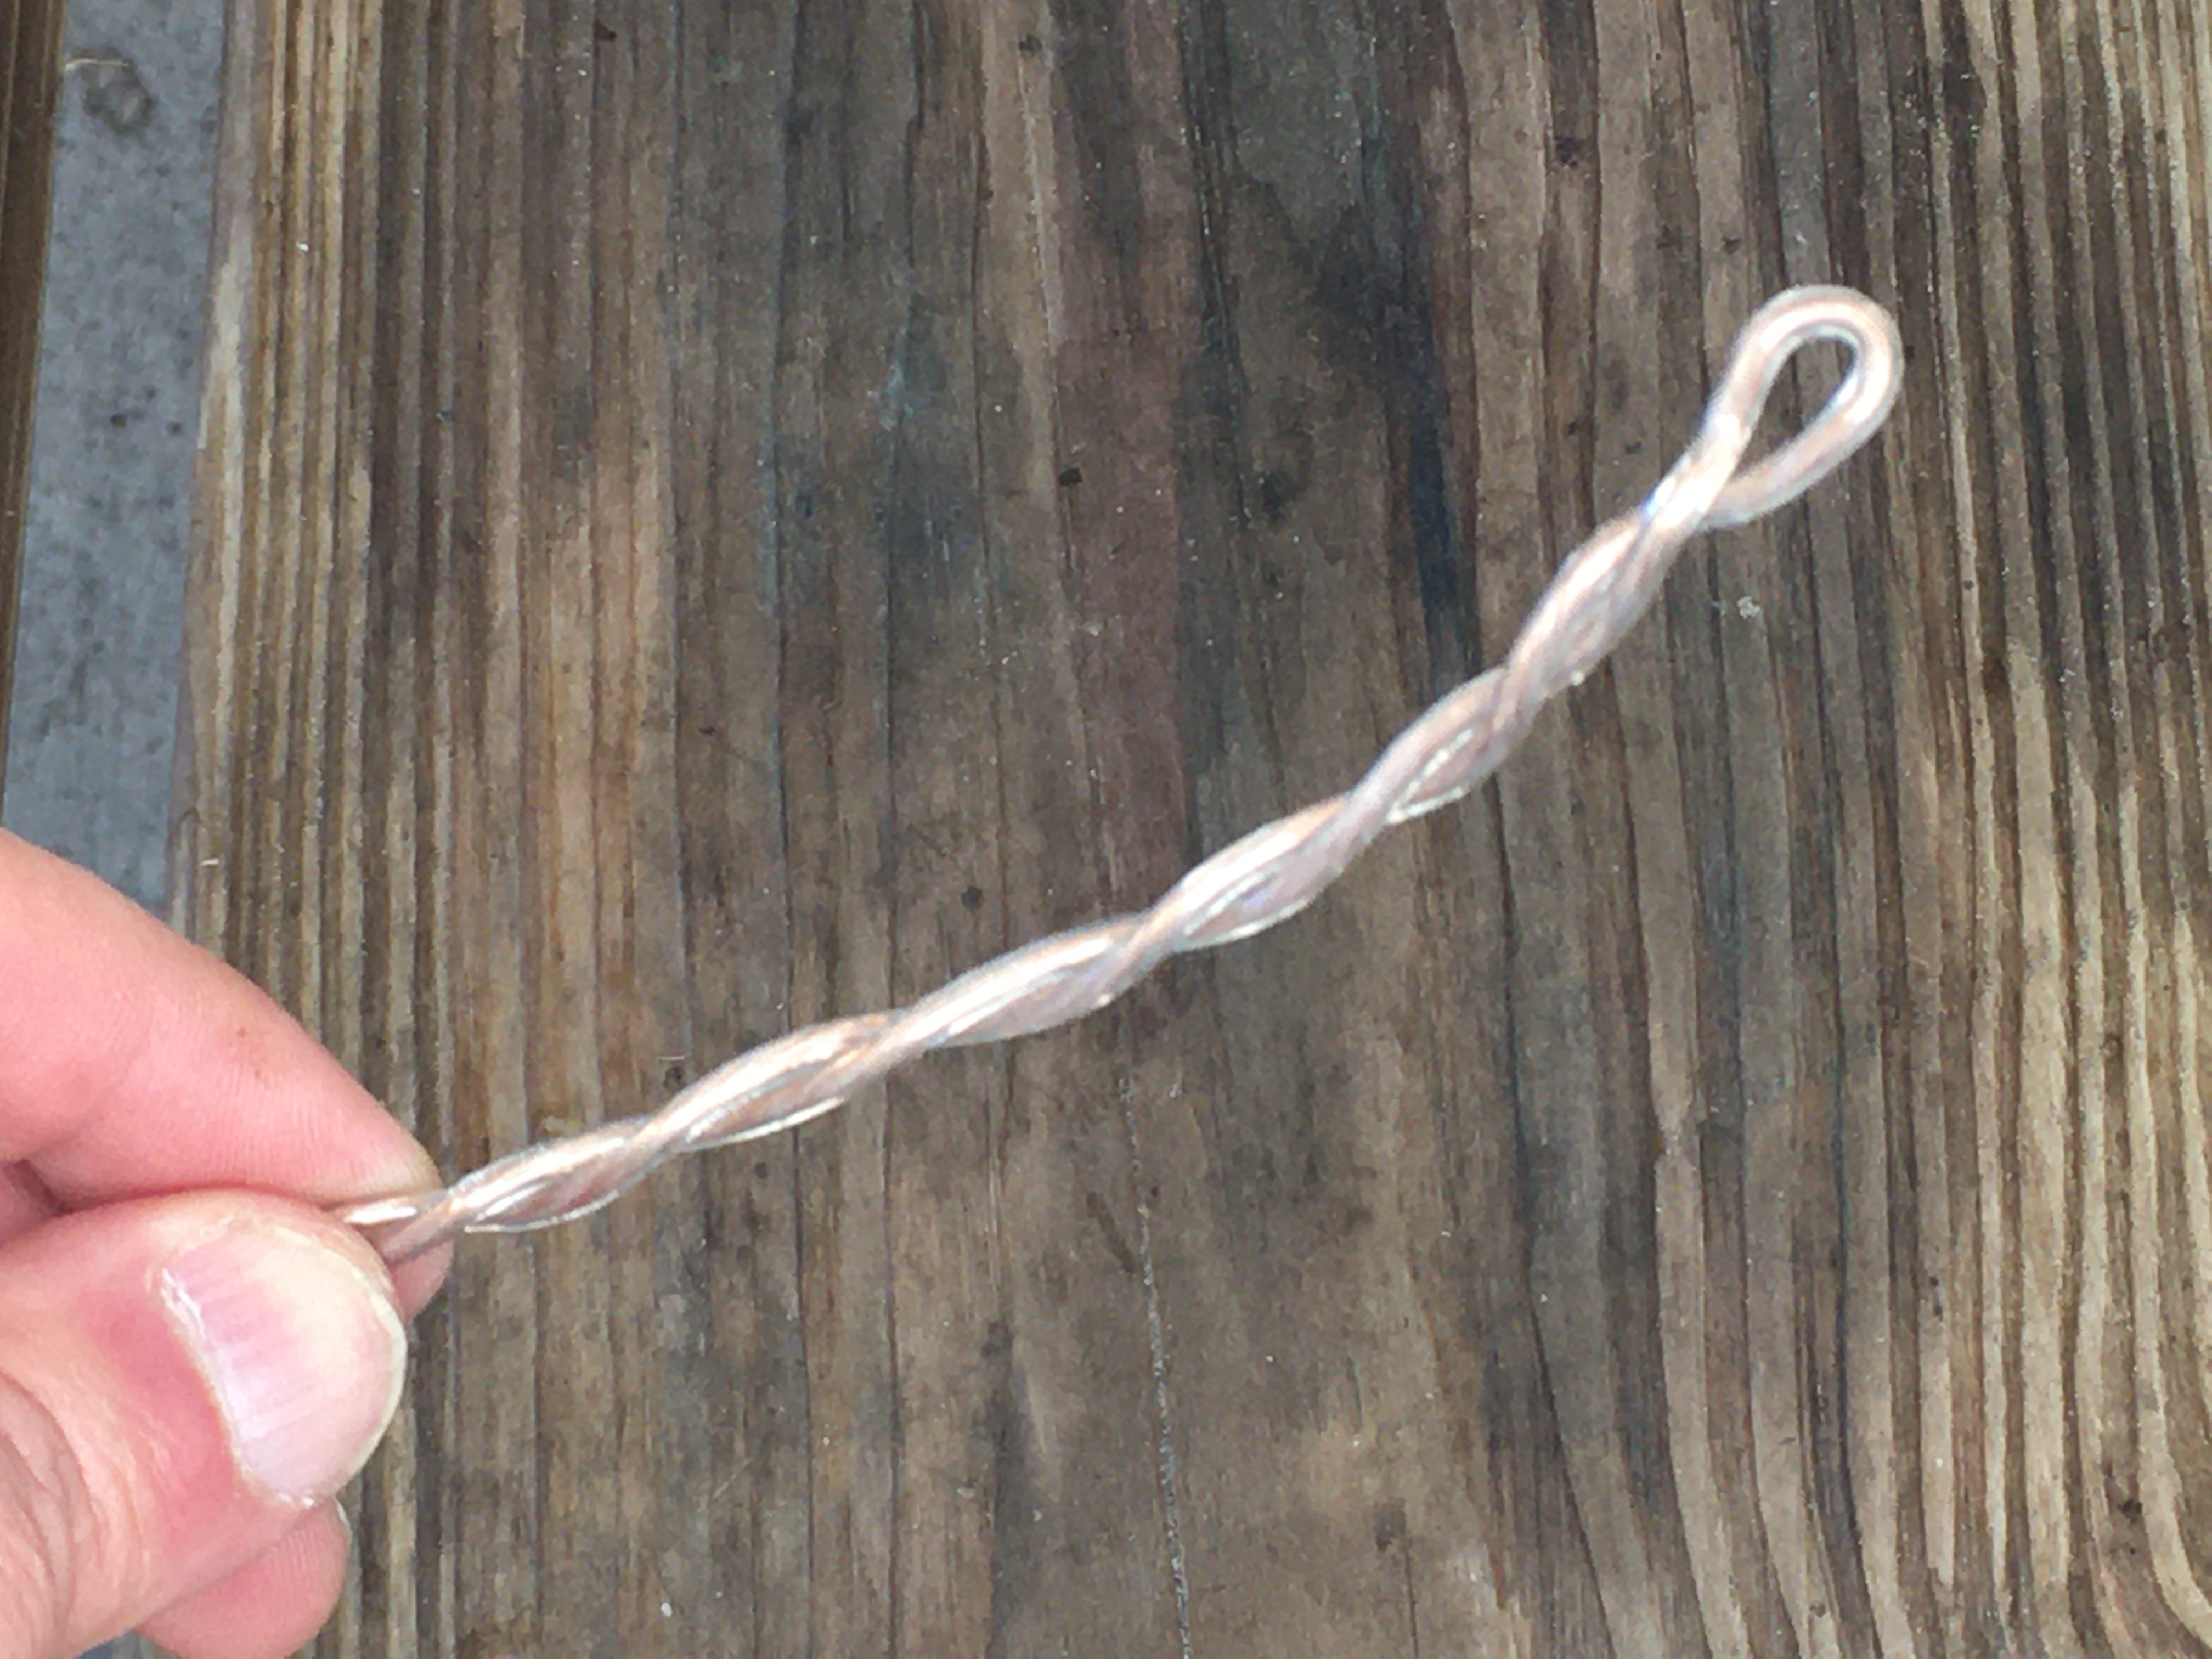
Another advantage of the reverse-wrap method is that the antenna can be re-tuned to lower frequencies if desired later on.

Feed your cordage through the loops created by the reverse-wrap and tie off with a simple overhand knot or two half-hitches. Then run the cordage to two trees located in opposite directions from the center point. I suggest tying off to the trees with a quick-release taut-line hitch; this allows for tensioning later on. Ideally, a dipole antenna should be flat topped (the ends at the same height as the center-point), but that’s almost impossible to pull off in the back country. You’ll end up with an “inverted-V” configuration, which is acceptable and sometimes creates some advantages.
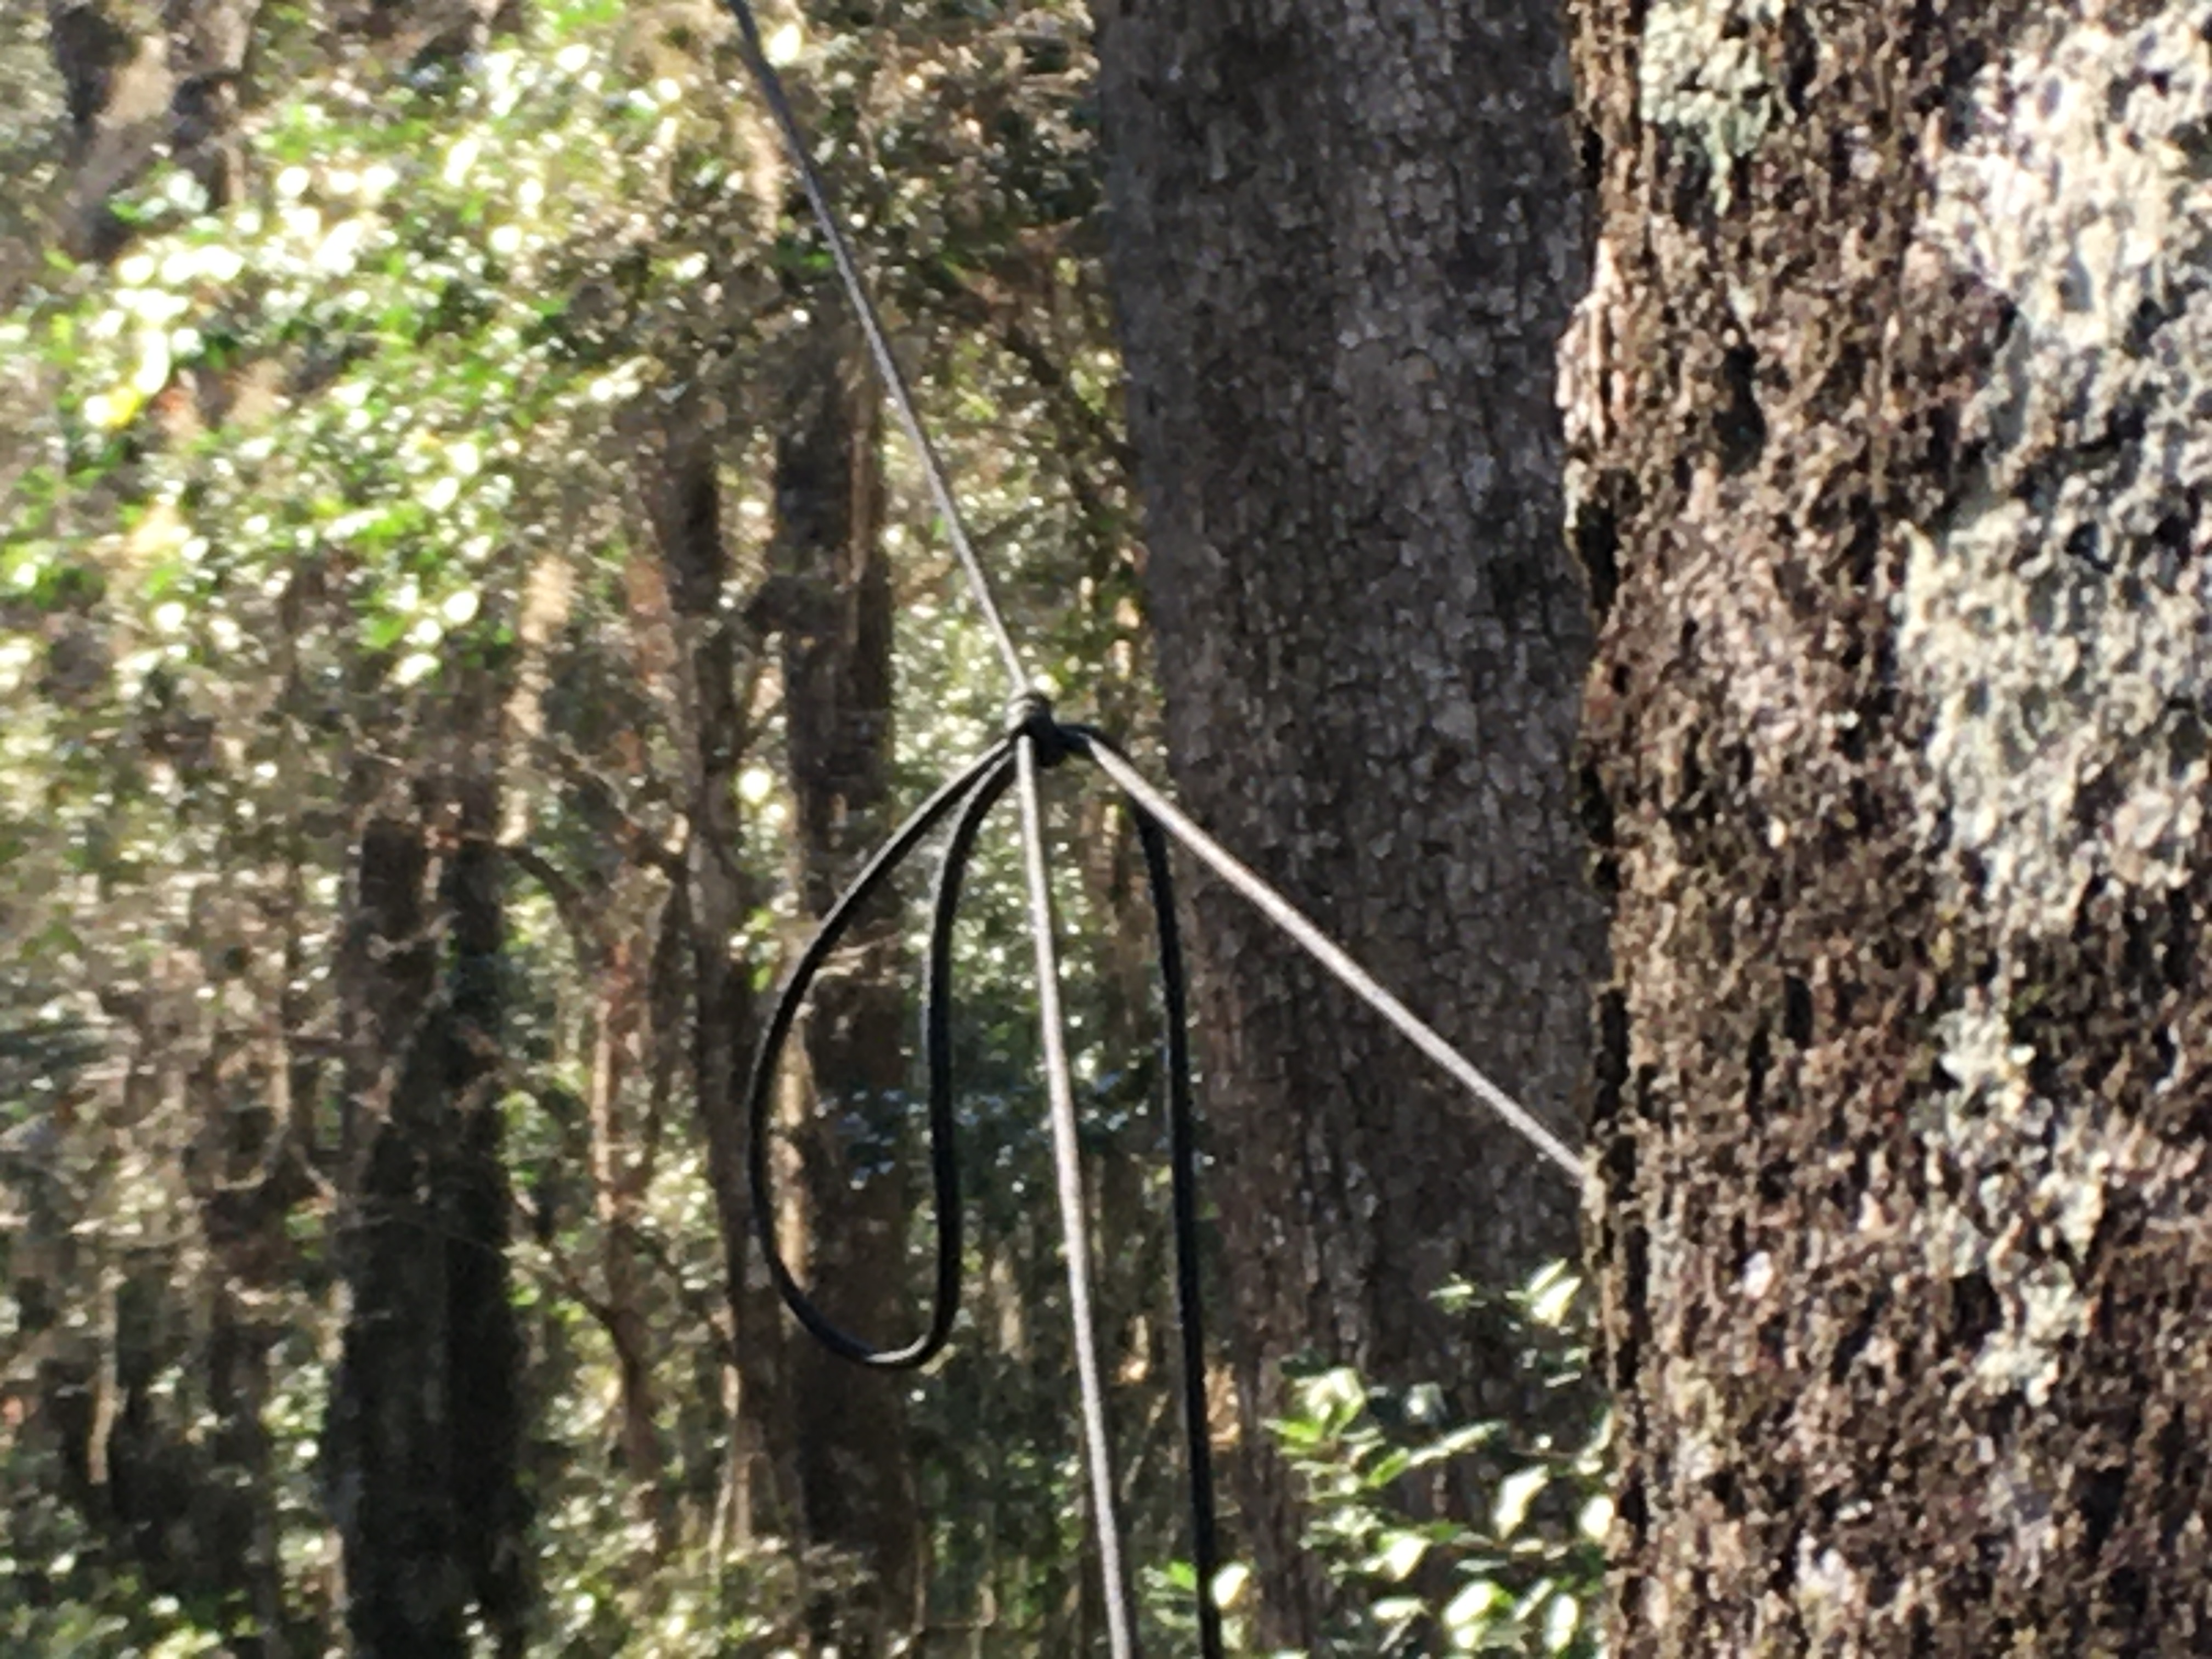
Tie the cordage attached to the legs to a tree using a quick release taut-line hitch.
How to Make a Dipole Antenna – Make Contacts
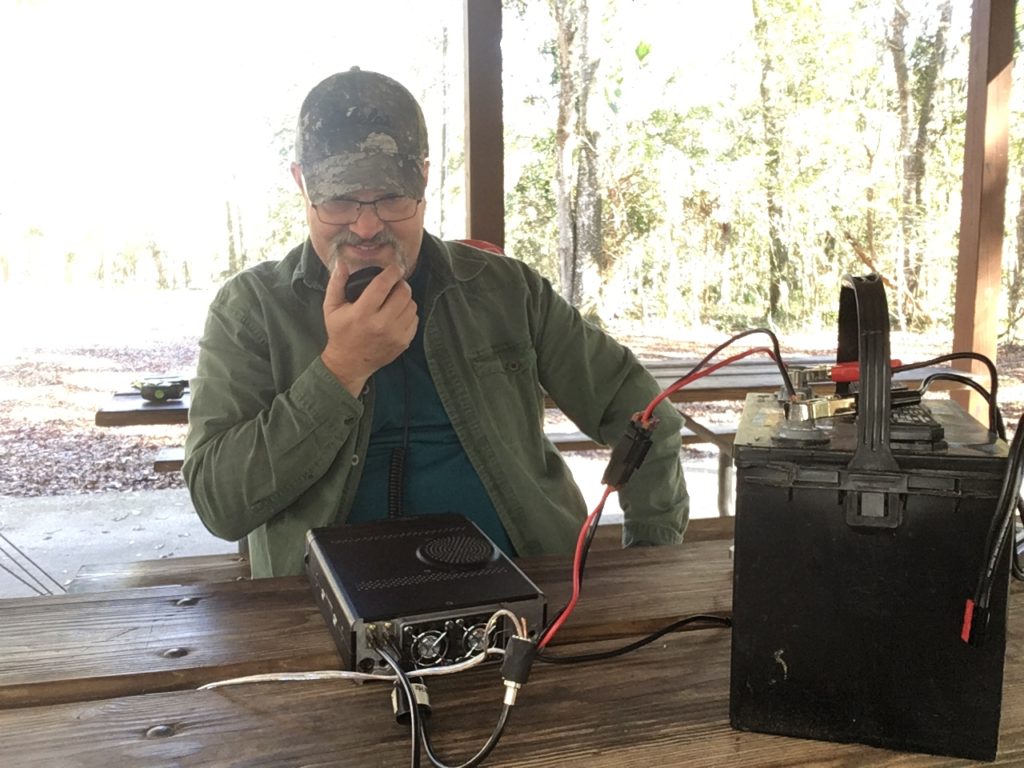
The “prefab” method of attaching your new field expedient antenna to your transceiver is with a BNC-banana connector. But not many of us carry a BNC-banana connector in our bug-out bag. Also, the transceiver in this scenario might need an adapter from BNC to PL-259. We might have one or both adapters in our radio go-kit, but if we have them of those with us, then they’re probably already attached to an antenna, which would make this post moot.
We need to do our best Professor on Gilligan’s Island impersonation. Remember the ends of the feed line that we separated and stripped off the insulation? As luck would have it, one side of that 18-gauge zip cord wire, folded back on itself, fits almost perfectly into the center of the SO-239 connector on the back of most mobile transceivers. Go ahead and connect that end.

The other stripped end needs to attach to the grounding post or screw on the transceiver. Actually, attaching it to any screw that is attached directly to the chassis of the radio will work. The FT-100D in the pictures here doesn’t have a grounded screw that’s handy, so I stripped a longer section of insulation and wrapped it around the threaded portion of the PC-259 connector, then secured it with a piece of tape.
Now that the antenna is suspended and connected to the radio, we’re ready to test for resonance. Because we made our cuts long, the resonant frequency will be low. That’s OK, remember that it’s easier to shorten a wire than it is to lengthen it. Use the reverse wrap trick to shorten the legs.
An antenna analyzer would make identifying the resonant frequency relatively easy, but that’s another item that doesn’t make sense in a bug-out bag. No worry, though, we can use the radio’s SWR meter to zero in on the resonant frequency. Use the following process:
- Turn on the radio.
- Reduce the transmit power to low (5-10 watts).
- Set the mode to CW, RTTY, or AM.
- Tune the frequency to 14.230MHz.
- Briefly key the mic and observe the SWR.
- If the SWR is above 3:1, then the antenna is probably too long.
- Turn off the radio.
- Use the reverse wrap method to shorten each leg by about 1 foot.
- Restart from the first step.
- If the SWR still isn’t below after shortening the legs three times, double check all of your connections and measurements or try to suspend the ends of the antenna a little higher.
- If the SWR reads less than 3:1, congratulations! You’re almost home.
- With the mode still set to CW, RTTY, or AM key and hold down the mic button (PTT) and slowly spin the VFO (tuning knob) to increase the frequency all the way to 14.325 or until you see a dip in the SWR. (This is called “sweeping” the band.)
- Make sure to make a full sweep from 14.230MHz through 14.325MHz, but don’t go lower or higher than this range to assure that you stay in the General class band privileges.
- Don’t key the mic and sweep longer than 7-10 seconds. Make sure to give the radio a 5 or so seconds between each sweep to avoid damaging the finals. (Most modern radios will automatically cut power if damage is imminent, but giving limiting the key down time is good practice, anyway.)
- Sweeping in this manner may cause interference (QRM) with other stations, but the low power output will make it minimal. Besides, if you’re getting ready to call for emergency help, then any means necessary is authorized.
- With the mode still set to CW, RTTY, or AM key and hold down the mic button (PTT) and slowly spin the VFO (tuning knob) to increase the frequency all the way to 14.325 or until you see a dip in the SWR. (This is called “sweeping” the band.)
- If the SWR is above 3:1, then the antenna is probably too long.
- Once you have identified the dip in SWR, sweep the VFO back and forth over those frequencies until you find the lowest SWR reading.
- If the dip in SWR is at a frequency lower than 14.265MHz, then the legs are too long and need to be shortened by reverse wrapping.
- If the dip is above 14.300MHz, then the legs are too short.
- If the lowest SWR is 3:1 or less at 14.265 through 14.300MHz, then you’re good to continue!
- Set the mode to USB.
- Slowly tune through 14.230-14.350MHz. If you hear a voice signal, key the mic and call, “EMERGENCY, EMERGENCY, EMERGENCY.”
- If no one answers, increase power by about 10% and call again (repeat until you reach full power).
- If the SWR climbs above 3:1, reduce power a little bit and make a few more calls at that power.
- If they still don’t reply, search for a stronger signal and call EMERGENCY, again.
- If you don’t hear any signals or no one replies to your previous attempts, tune to 14.300MHz and make an EMERGENCY call. (Repeat for 3 minutes, or until someone answers.)
- If no one answers after a few minutes, tune to 14.265MHz and call EMERGENCY.
- Continue the process described in italics until someone answers.
- If no one answers, increase power by about 10% and call again (repeat until you reach full power).
- Slowly tune through 14.230-14.350MHz. If you hear a voice signal, key the mic and call, “EMERGENCY, EMERGENCY, EMERGENCY.”

When hooked up to my friend Scott’s hand-dandy antenna tuner the SWR on 14.270MHz was about 2.2:1 at 50 ohms. This is plenty resonant to make a call for emergency help. With more tweaking it could come down to 1.5:1 or better, but in an life threatening situation we want to call for help as soon as we can. Any solid state radio can more than handle SWR up to 3:1.
Now You Know
How to Make a Dipole Antenna
Congratulations, you just made an emergency, field expedient dipole antenna! Hopefully, you didn’t need it for an emergency, but you made and used it just for the fun of learning something new.

Here’s the finished antenna coiled and zip tied (with a reusable zip tie) and ready to stow in my bug-out bag.
I encourage you to try the same process for making this dipole antenna for other frequency bands, too. These principles can be applied to any frequency. If you need an antenna to talk through a 2-meter repeater, you can cut the lamp cord to length and then attach the legs to a stick so that they can make a vertical dipole. Do you have a few hundred feet of speaker or lamp cord? Try making an 80-meter dipole. If it doesn’t work, you can always cut it down for the other bands.
Literally, the sky is the limit, or at least the ionosphere is.
One final point, some people may ask why build a dipole antenna instead of a long wire (or random long wire). First, long wire antennas are notoriously fiddly and finicky. There are certain wire lengths that if used on certain frequencies create all kinds of problems, some of them can cause harm to equipment or flesh. Second, long wire antennas require at least on half-wave of wire (a full-wave plus is preferable) and still require another length of wire for a counter poise. Look for a future post about how to make a long-wire antenna, but for now get this one under your belt so that you’re ready, just in case.
Remember, survival is more than just staying alive.
If you need to brush up on your knots, here are some videos by Creek Stewart demonstrating both the Evenk (or Siberian) hitch and the taut-line hitch. Canopy Shelter Knots